Without a drop of oil/a bit of fat added, these old-styled Chinese egg cakes are light, healthy and just delicious. They also bring back a lot of childhood memory. At that time, cakes were a novelty because nobody owned an oven to make them at home. They were only available at a few shops in the town. Everyday my sister and I could not wait for our mum coming back home from work because we could always happily find these yummy cakes in her purse. I tweaked the traditional recipe by adding dried cranberry and a handful of nuts.
Makes 12 egg cakes,
- 75g cake flour 低筋面粉 (all-purpose or plain flour works it just doesn’t produce a cupcake as soft as cake flour)
- 3 large eggs room temperature
- 60g caster sugar白砂糖
- 2 tablespoons dried cranberry蔓越莓干
- 1 tablespoon corn flour生粉
- 1 tablespoon pine nuts or sunflower nuts (optional)松子或瓜子仁

Method
- Preheat the oven to 170℃ or340°F. Line a cupcake/muffin pan with cupcake liners.
- Dust dried cranberry with corn flour.

- Place eggs into a large mixing bowl, use an electric mixer to whisk the eggs on medium speed (30 seconds). Gradually add into sugar and beat on high speed until the eggs have tripled in volume. This takes about 8-10 minutes. This is the most important step of the whole process. You will need beat the eggs until really light, silky and white without bubbles at all.

- Sift flour into the beaten eggs. Gently fold flour in until you can’t see flour anymore, then fold in dried cranberry.

- Now pour the batter into a lined cupcake pan. I use a level ice cream scoop for even measuring. Fill liners to about 2/3 full (do not over-fill). Sprinkle with 8-10 pine nuts. Place the cupcake pan into the middle rack of the oven. Bake for 20 minutes. You can insert a toothpick into the center of the cake. The cupcake is done if the toothpick comes out clean.

- Remove the pan from oven and place it on the cooling rack for about 10 minutes.


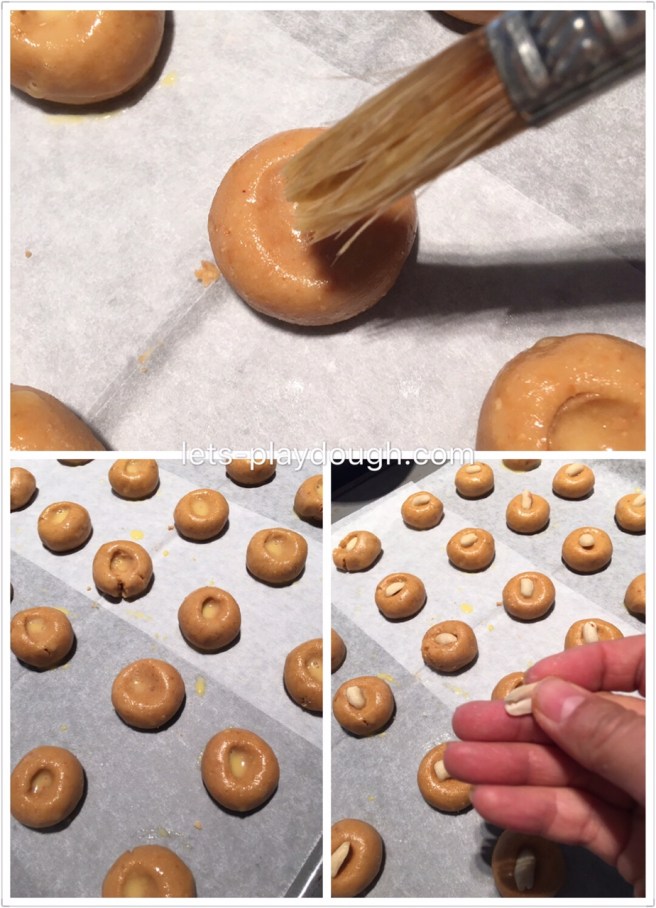
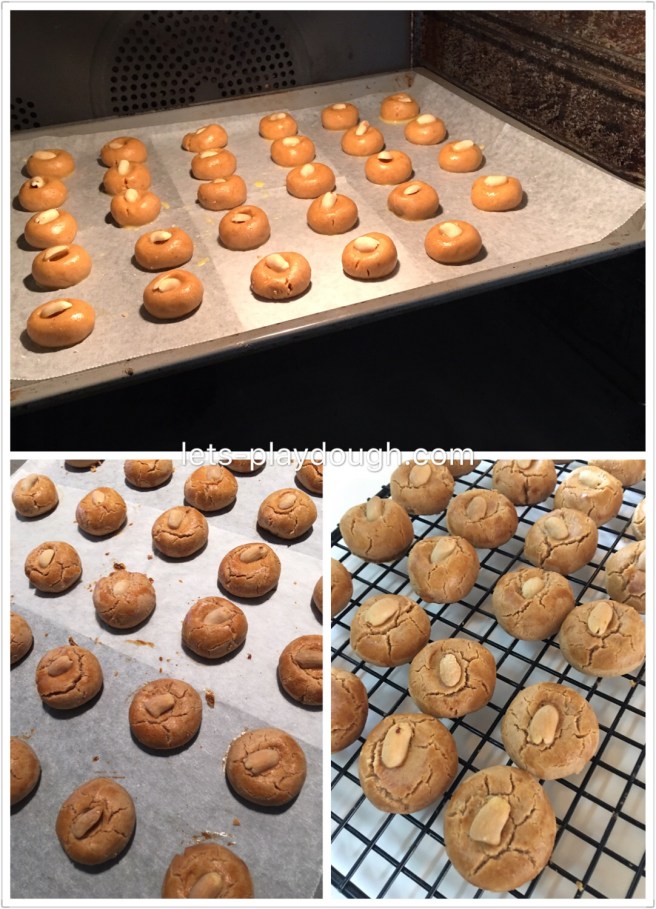


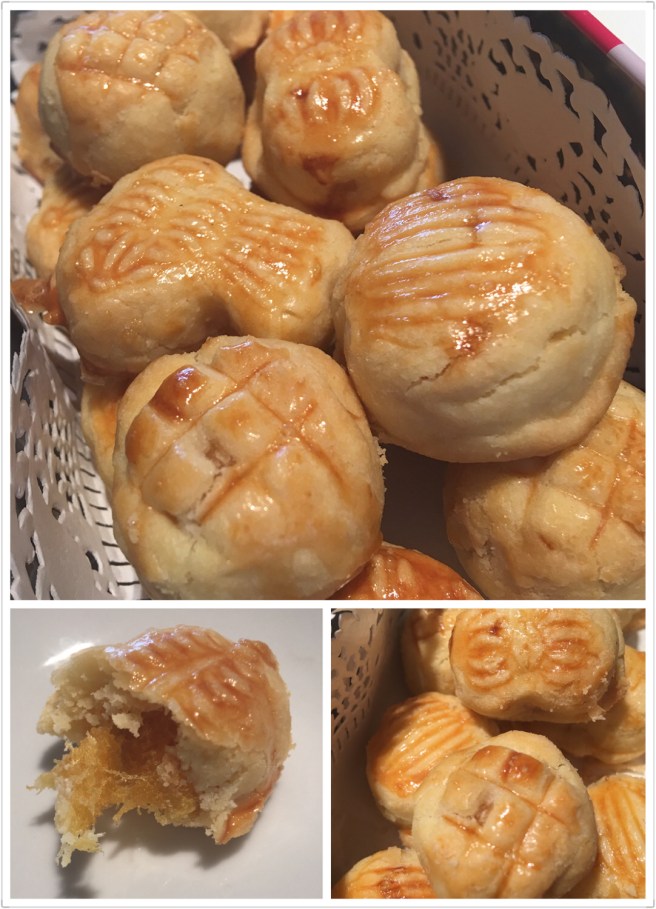
 With the Chinese New Year around the corner, you can find pineapple tarts just about everywhere in Singapore or Malaysia . Every bakery that churns them out is claiming that it’s tarts are the best. But I found out today these melt-in-mouth homemade tarts with buttery crumbly pastry and fresh homemade pineapple jam are the BEST I’ve had so far. It calls for simple and fresh ingredients with minimized use of sugar. No preservatives added at all.
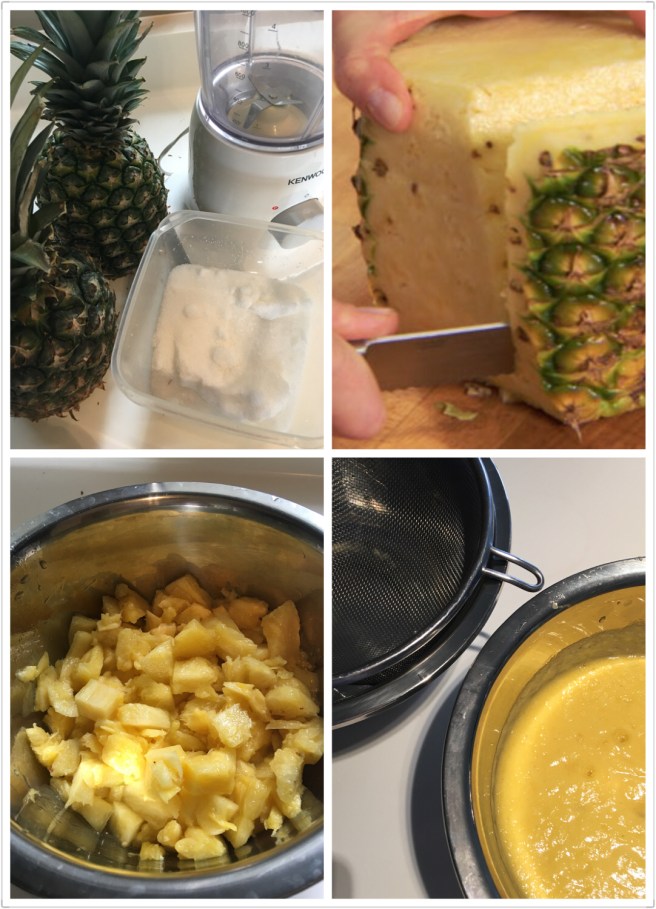
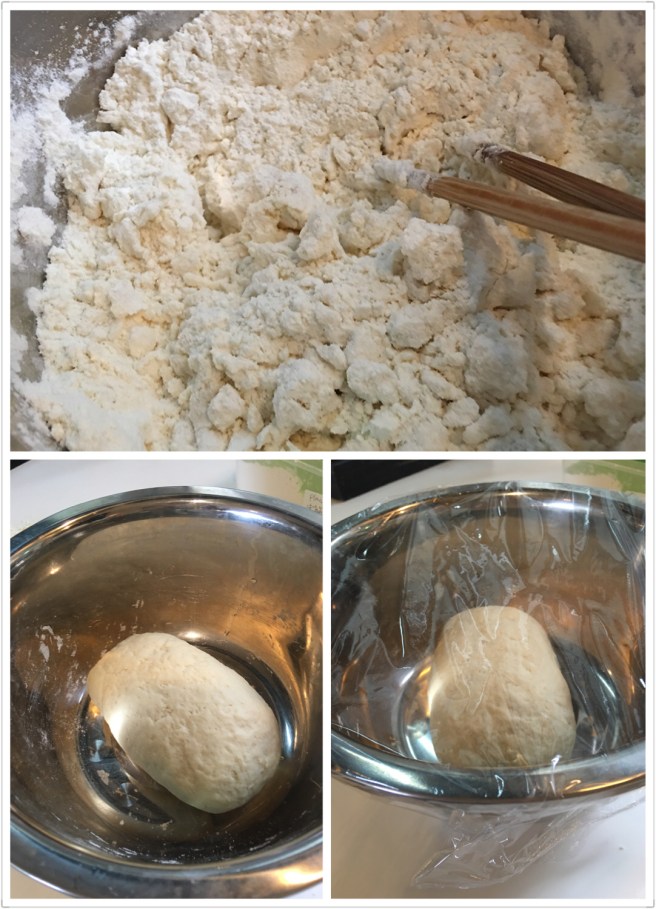
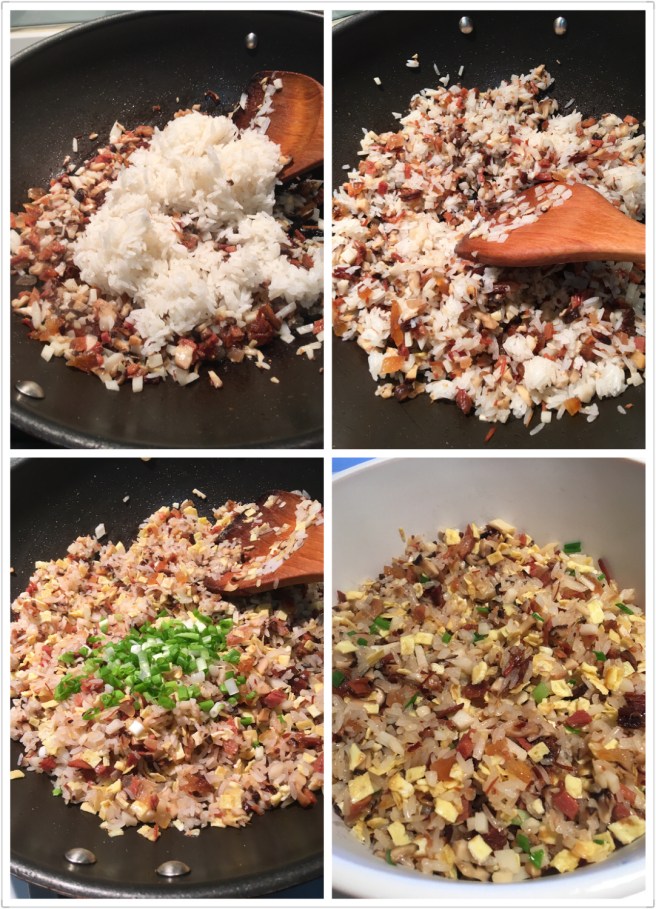
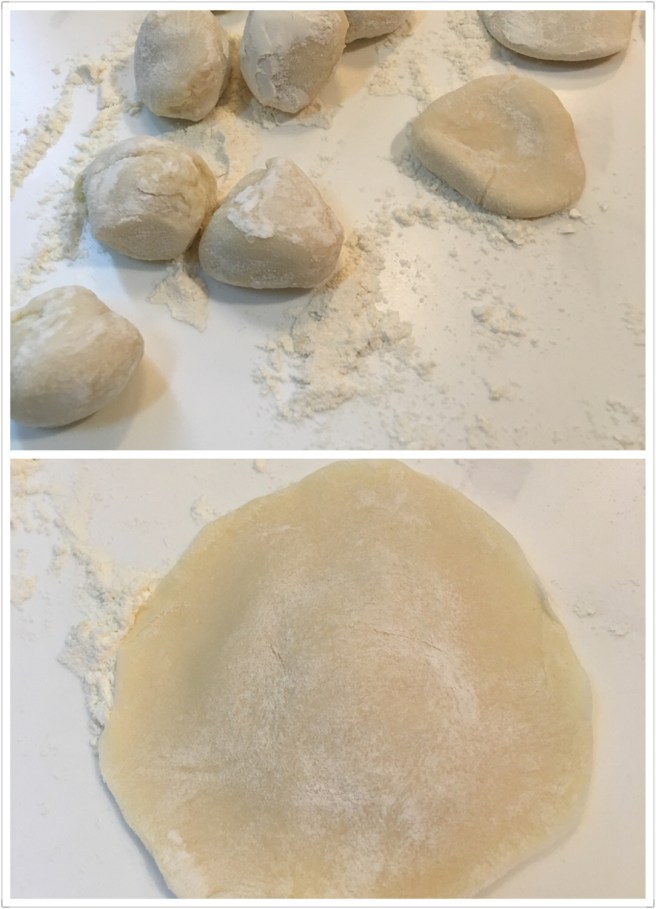
 Step 2 make the wrappers
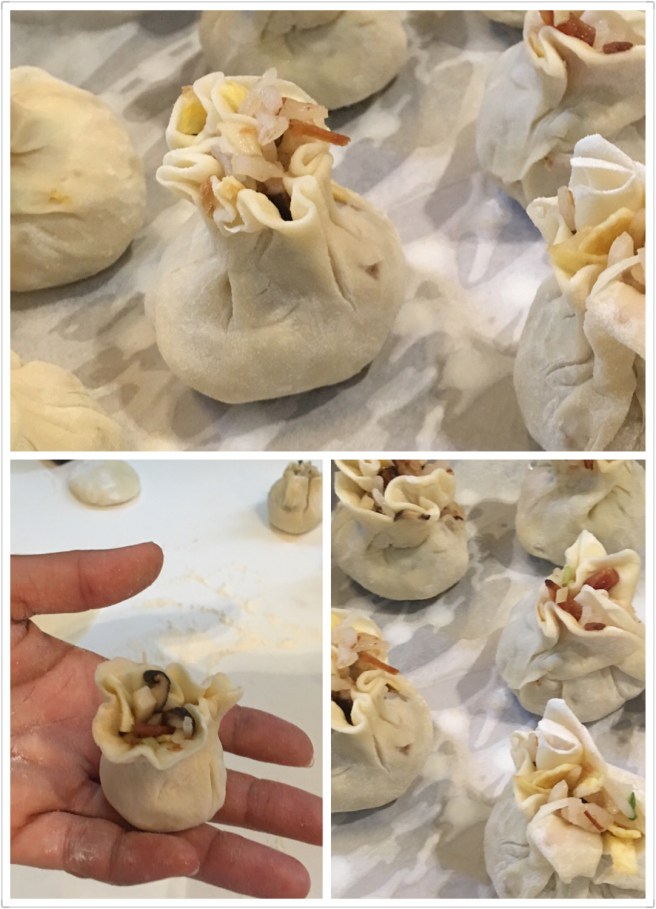
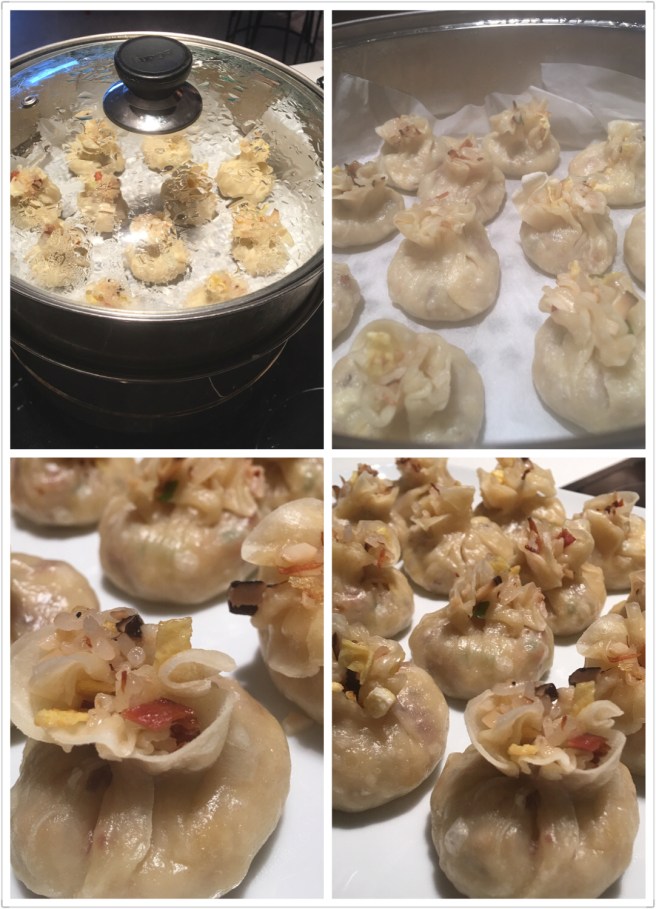
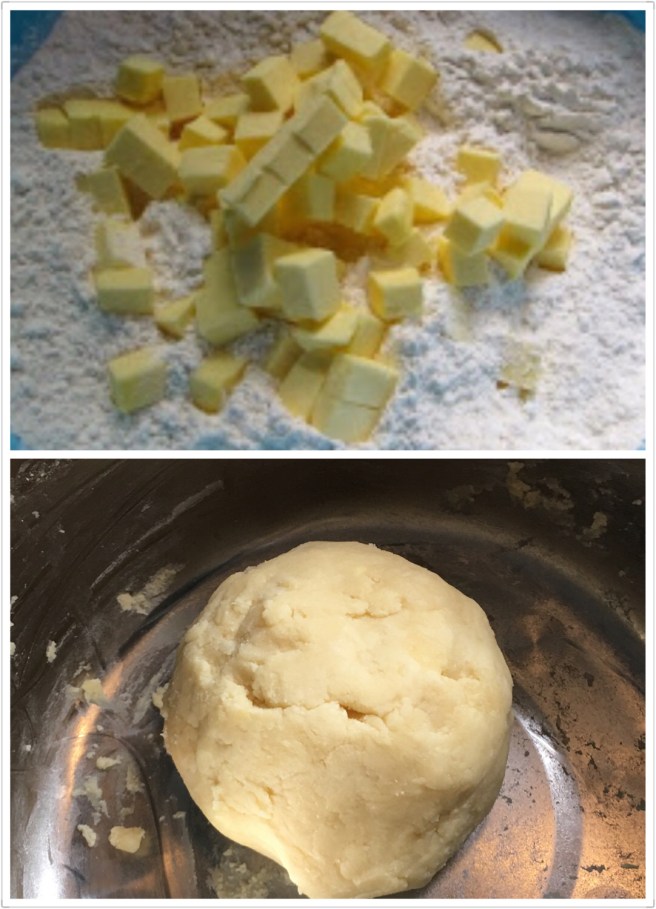 Step 3 Assemble
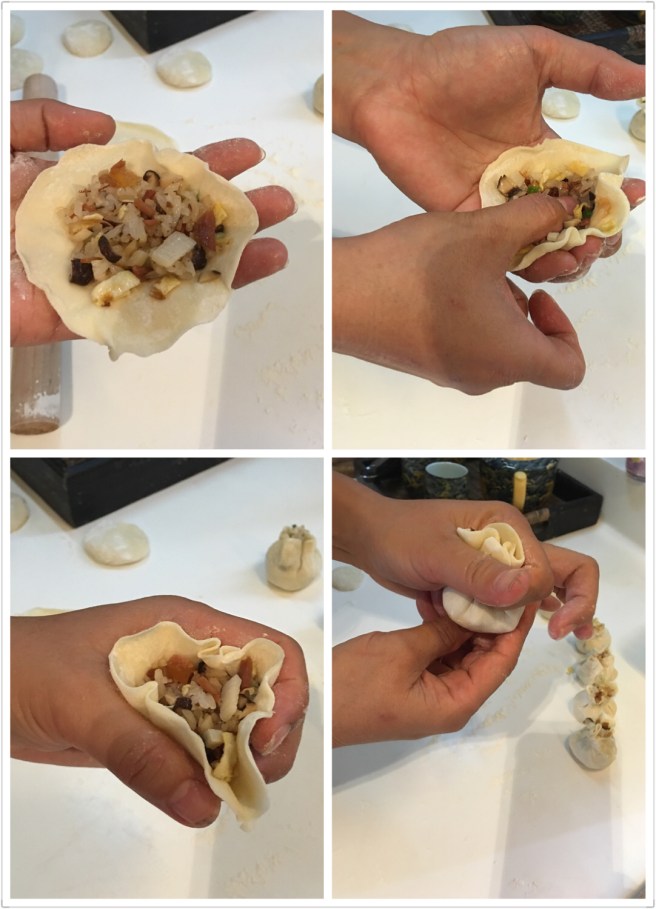