Snow skin (Mochi) mooncake is a non-baked mooncake eaten during Chinese Mid-Autumn Festival. The mooncake skin texture is quite similar with mochi: soft, chewy and milky. While snow skin mooncake can be filled with variety of things, lotus seeds paste is my favorite. Lotus seeds are used extensively in Chinese cooking, especially in the form of paste. The paste can be made in advance and keep refrigerated or frozen. Snow skin mooncake should be kept refrigerated in airtight container and typically serve cold. You shall be able to find all the ingredients and the mooncake mould in Asian markets or Amazon.
Makes about 20 pieces (50g each piece)
Homemade lotus seeds paste filling 莲蓉馅 (yield 450g lotus seeds paste)
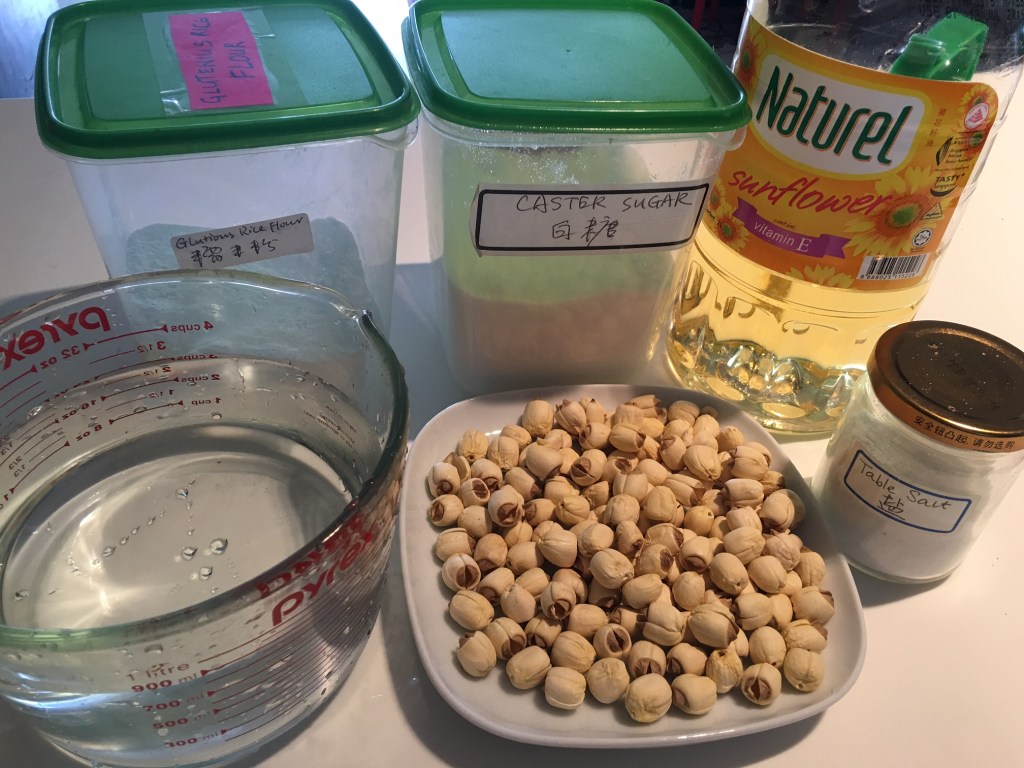
150g dry lotus seeds 白莲子
800ml water
110g granulated sugar 白砂糖
15g glutinous rice flour糯米粉
75g cooking oil
3 tablespoons water
¼ teaspoon salt
Wrappers (yields about 640g snow skin/Mochi)
350g milk
35g cooking oil
80g rice flour米粉
40g wheat starch 澄粉
80g powdered sugar糖粉
1 teaspoon green tea/cocoa powder(optional)
A few drops food coloring (optional) or use natural coloring like pumpkin juice or carrot juice
50g glutinous rice flour糯米粉 (cooked, instructions below) for dusting

Method
Step 1 make the lotus seeds paste
Wash and rinse 150g dried lotus seeds. Soak for a few hours or overnight in the refrigerator (depending on the dryness of the seeds). Soaking help lotus seeds to cook evenly and reduce cooking time.Split the seed in half and remove the bitter-tasting germ (green sprout).

Drain the add in 800ml water, bring to the boil, reduce to low heat and cook for 1 hour and half. Keep the pot partially open to prevent boiling over. Try to use a spatula to stir from the bottom every 20 minutes to keep it sticking to the bottom.
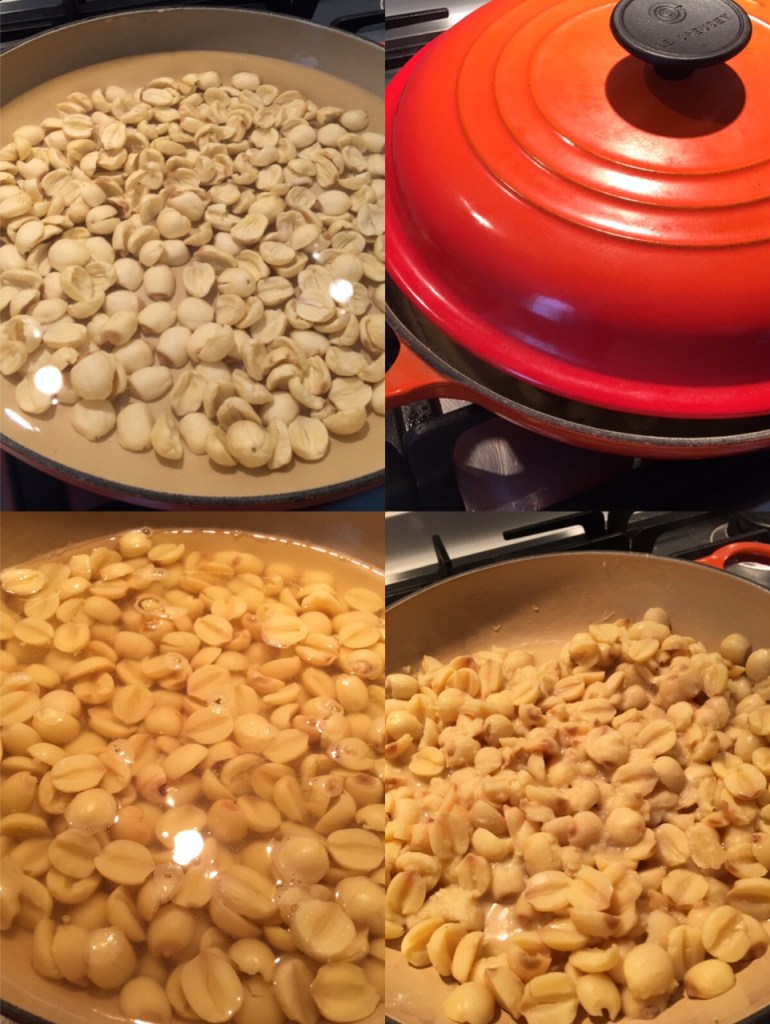
Puree until smooth using a blender. If your lotus seeds seem too dry, just add a few tablespoons of water. Sift the lotus seeds puree for smoother paste texture.

In a small bowl, mix 15g glutinous rice flour and 3 tablespoons of water. Add the mixture into the pot together with 100g sugar, ¼ teaspoon salt and 75g cooking oil. Stir well.
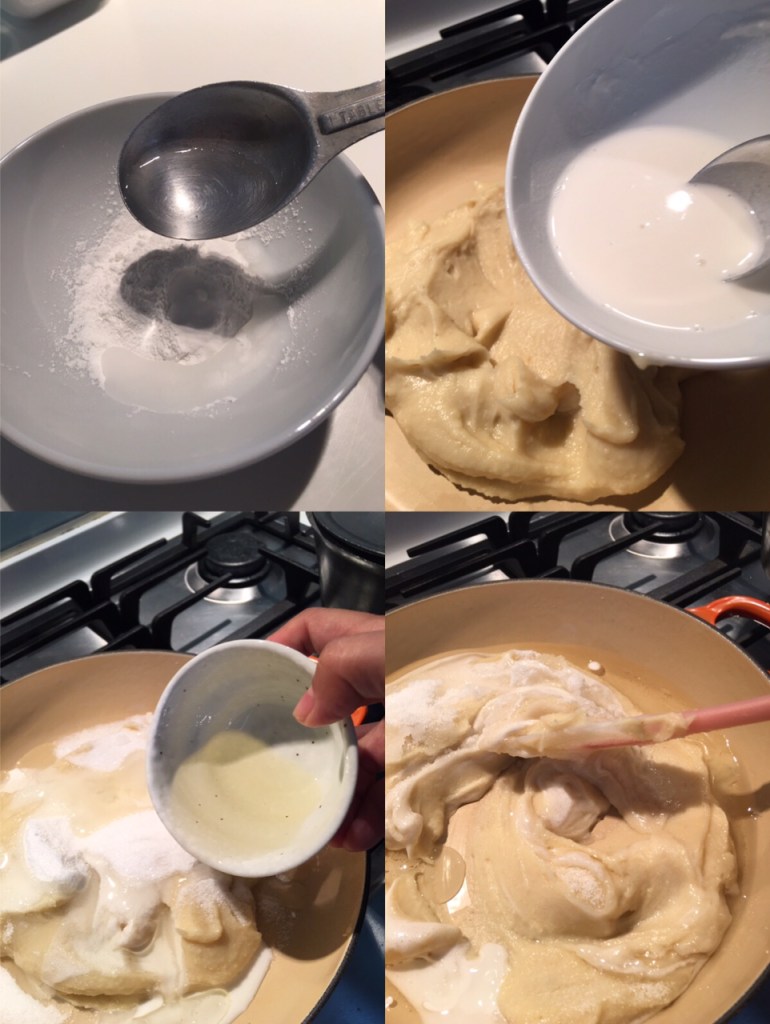
Cook over medium-low heat until smooth paste formed, stir constantly. It takes about 40 minutes, cooking time may vary slightly depending on your cooking temperature.
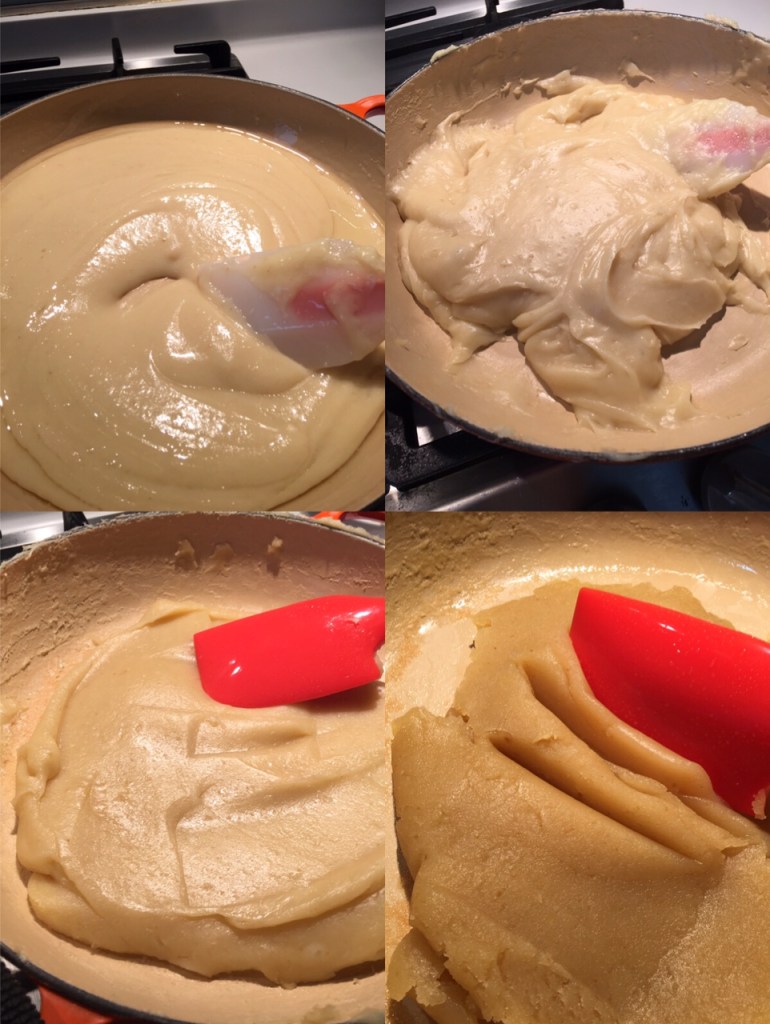
Cook until puree thicken, smooth and silky paste formed. Wrap with cling film and keep it in the fridge for a few hours. Paste will harden slightly when fully cooled.

Step 2 make the wrappers (snow skin/Mochi)
Add in all snow skin ingredients, mix until smooth. Sieve the mixture into a bowl. 过筛

Cover the bowl with clingy film and steam over medium-high heat for 25 minutes.

Mix the cooked dough with chopsticks while still hot. (it makes easier to handle than with spatula). After the dough has slightly cooled down, wrap it with clingy film and keep refrigerated for 2 hours, or until fully cooled.

Step 3 Assemble
Prepare the dusting flour by cooking the flour. Place a small amount of glutinous rice flour (50g) evenly in a dry pan and cook for about 10-15 minutes over lowest heat. Stir from time to time. It is done when the flour slightly turns yellow.

Lightly dust the inside of the mooncake mould with cooked dust rice flour.

Divide the dough and filling into small equal portions (dough/wrapper 30g each; filling 20g each). Lightly coat your two hands with dusting flour. Flatten the dough piece with palms, top with filling, then fully wrap the filling with dough.
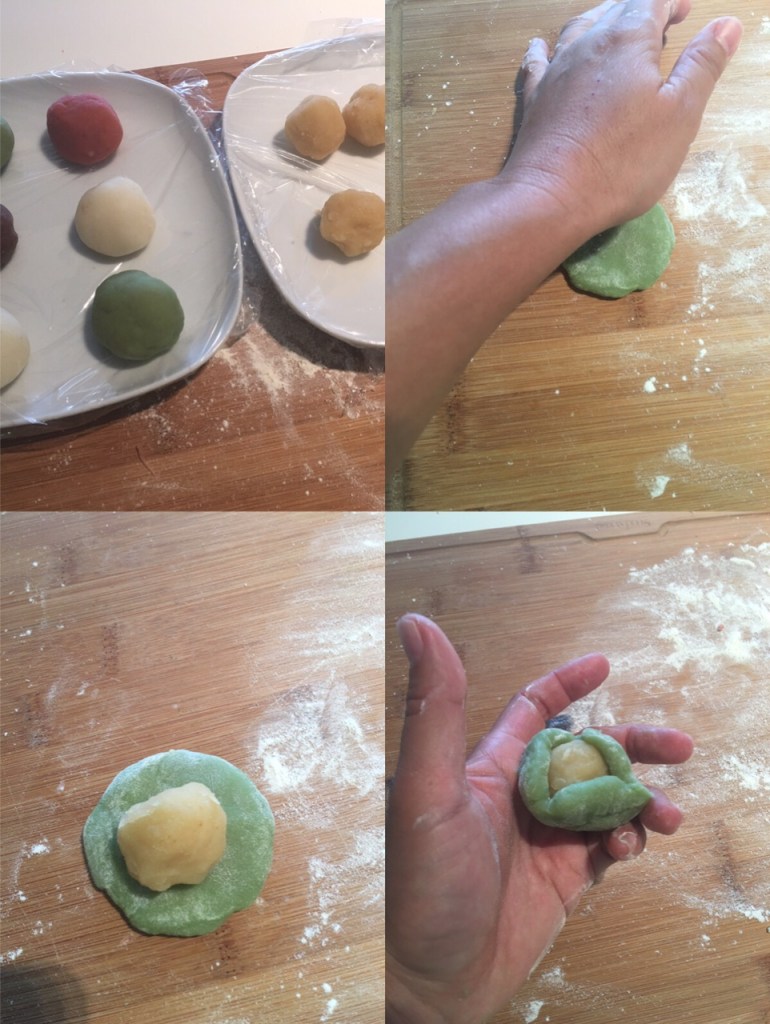
Shape the filled dough into ball, then put into the mooncake mould to create pattern on it.
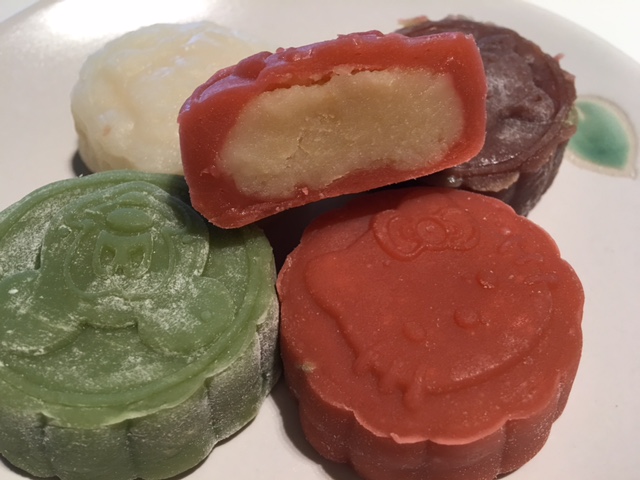
Chill the mooncakes for 1 hour before serving for a better texture.

Tips:
- You can make bigger or even smaller mooncakes. Just remember to keep the ratio of filings and wrappers 2:3. I’ve used 20g filling and 30g wrapper to make one 50g mooncake.