Mini Egg Cakes 鸡蛋糕

letsplaydough's avatar

IMG_0117Without a drop of oil/a bit of fat added, these old-styled Chinese egg cakes are light, healthy and just delicious. They also bring back a lot of childhood memory. At that time, cakes were a novelty because nobody owned an oven to make them at home. They were only available at a few shops in the town. Everyday my sister and I could not wait for our mum coming back home from work because we could always happily find these yummy cakes in her purse. I tweaked the traditional recipe by adding dried cranberry and a handful of nuts.

Makes 12 egg cakes,

  • 75g                   cake flour 低筋面粉 (all-purpose or plain flour works it just doesn’t produce a cupcake as soft as cake flour)
  • 3                        large eggs   room temperature
  • 60g    …

View original post 219 more words

Char Siu (Chinese Barbeque Pork)叉烧肉chā shāo ròu

cover1 (1)
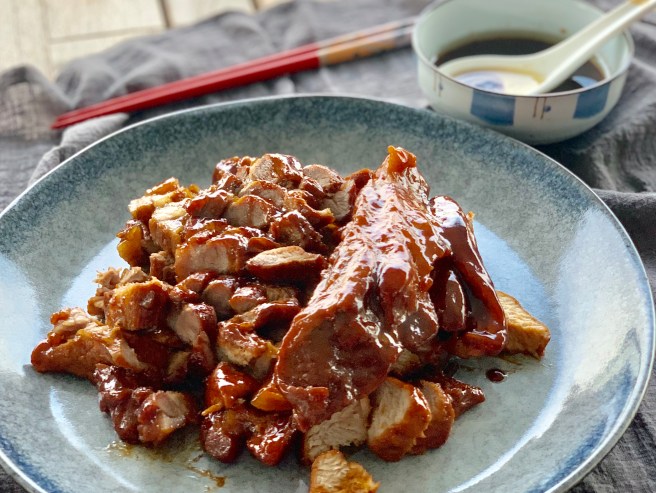
A surprisingly easy way to make Char Siu, Chinese Barbeque Pork or chā shāo ròu by cooking it straight in the wok. Though it still cannot beat a charcoal roasted Char Siu, it is addictive in its own right. The cut of meat is important.  You can use pork collar, shoulder or belly. Basically, you want to have a strip of meat with enough fat surrounding it so that it will remain juicy after roasting.

Serving 4-6

  • 1000g                       pork (use pork shoulder or pork collar)
  • 2 tablespoons         cooking oil

Cooking sauce

  • 1 teaspoon             salt
  • 1 teaspoon             white ground pepper白胡椒粉
  • 1/2 teaspoon           five-spice powder五香粉
  • 1 and 1/2 tablespoons        caster sugar白糖
  • 1 tablespoon          Chinese cooking wine
  • 1 teaspoon             sesame oil香油
  • 1 teaspoon             dark soy sauce老抽
  • 1 tablespoon         honey蜂蜜
  • 2 tablespoons        Hoisin sauce海鲜酱
  • 2 cups                    water in room temperatureIMG_0495.JPG

Method

  1. Place oil to a heated wok over a medium heat. Place the pork in the wok. Brown the both sides of the pork. This takes about 5 minutes.IMG_0684
  2. Let’s make the cooking sauce. Get a bowl, place all the ingredients of cooking sauce and mix well.IMG_0500.JPG
  3. Pour the cooking sauce into the wok. Bring it to a boil. Then cover the work with a lid. Cook over low-medium heat for about 60 minutes. Open the lid and flip the pork a few times over the course.

IMG_0685

4. You will see the sauce gradually reduced. When the sauce becomes thick gravy, turn off the heat.

IMG_0687.JPG

5. Place the pork in a cutting board. Slice the pork. Place it. Then pour the gravy on top of the dish.

Pumpkin Chinese Steamed Bun金瓜馒头jīn guā mán tóu

cover
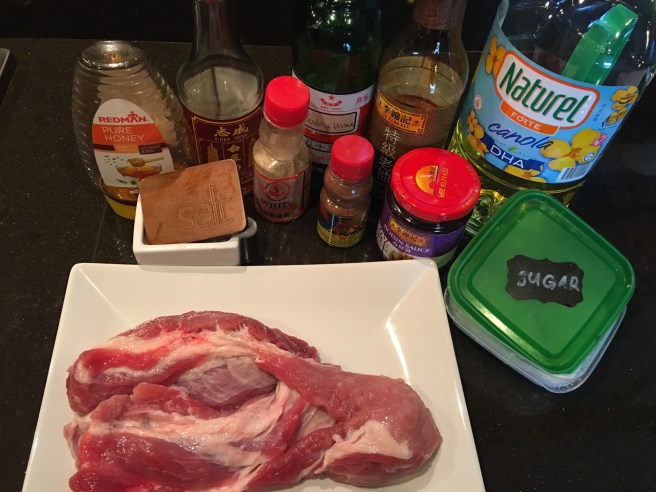
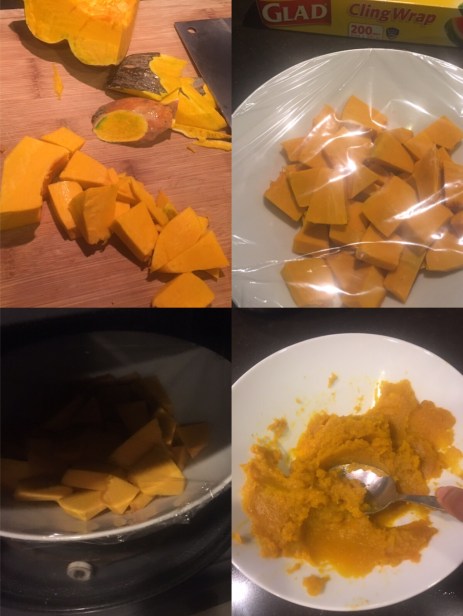
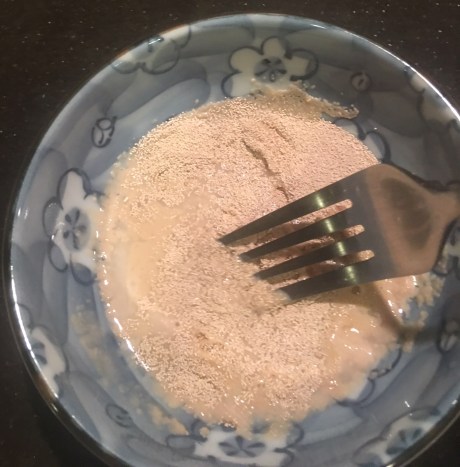
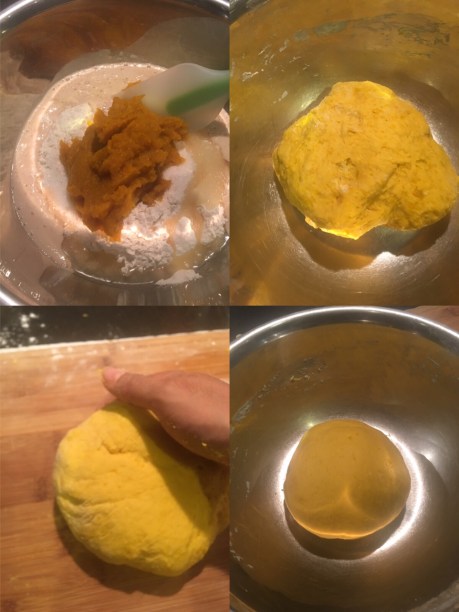
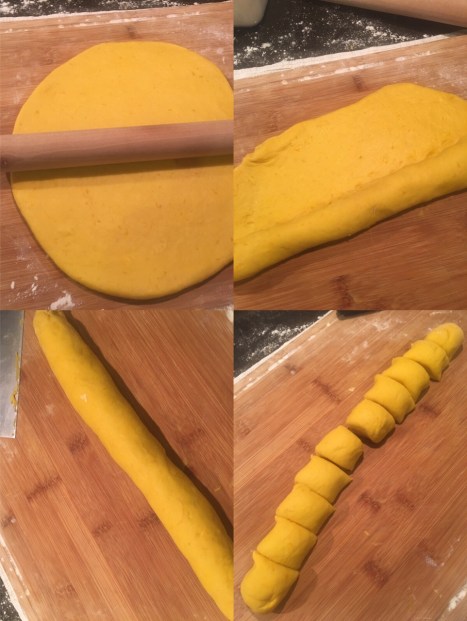
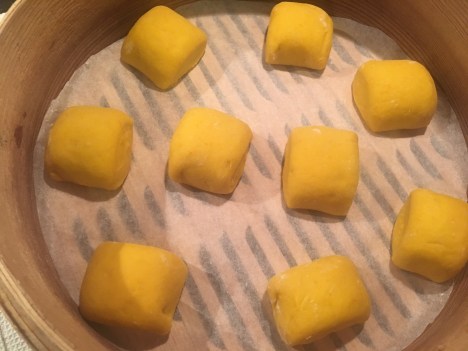
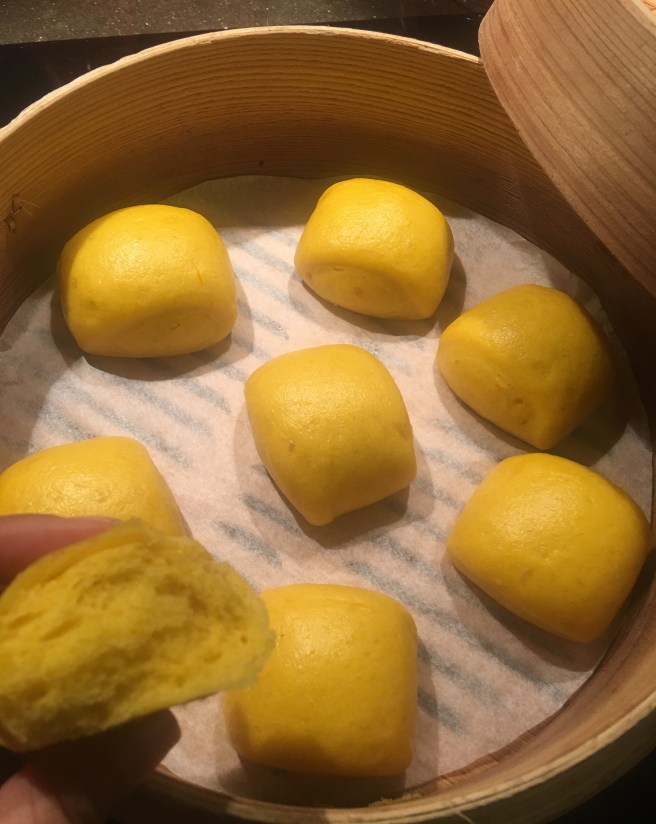
This is I call the Chinese version of dinner rolls and it can be an easy and healthy breakfast option as well. The golden yellow Chinese Steamed Bun or mán tóu, are made with fresh pumpkin. It has mild sweet flavor with soft and fluffy texture. You may make lots of these pumpkin mantou ahead of time and freeze it. To serve, just steam it again until softened.

 Yields about 20 Bun (Mantou),

  • 220 g             pumpkin flesh (peeled and sliced) 新鲜南瓜 for making pumpkin purée
  • 1 and half teaspoons      yeast酵母
  • 2 tablespoons       lukewarm water (40°C)
  • 250g                       plain flour 中筋面粉
  • 40g                          caster sugar 白糖
  • 1 and half tablespoon      cooking oilingredients.JPG

 Method

  1. To make pumpkin purée, remove the skin and seeds, thinly slice it then cover the bowl with cling wrap and put in microwave in high heat for 4 minutes. The Use a spoon to smash the pumpkin to make the purée. Cool it off.IMG_0619.JPG
  2. Resolve the yeast in 2 tablespoons of lukewarm water in 40℃.FullSizeRender.jpg
  3. Mix together plain flour and caster sugar. Add in resolved yeast and cooled pumpkin purée, mix well. Add in vegetable oil, mix into a dough. Knead the dough for about 6 minutes, until the outer is smooth. The dough should be soft but not sticky. If your dough is drier, add in a bit more water. If it is sticky, lightly coat hand with flour when kneading.IMG_0620.JPG
  4. Cover the dough and let it rest for 15 minutes.IMG_0594.JPG
  5. Divide the rested dough into 2 equal pieces.IMG_0595
  6. Roll out one dough into thin rectangular shape dough, then roll up tightly into a rod shape. Cut into 10 portions using pastry knife.IMG_0623.JPG
  7. Arrange them on a parchment paper-lined bamboo basket. Leave some space between each as the buns will expand when steaming. Repeat the process with the other piece of dough. If you do not have the bamboo basket, any stainless steamer will work fine. Just make sure the lid has a hole as the hole helps prevent the condensation water from dripping onto buns, Cover the bamboo baskets and let them proof for 20 minutes. This is we call the second proof/rest.IMG_0604.JPG
  8. Fill a steamer pot or wok with water and bring the water to a boil. Place onto the stack of bamboo baskets or any the stainless steamer you would have. Cover the steamer. Turn to the high heat and cook for 12 minutes. Turn off the heat. Don’t open the lid yet. Let it rest for 2 minutes then open the lid.IMG_0606.JPG
  9. Enjoy your fluffy and chewy Mantou!results.jpg

Homemade Chinese Rice Wine 蔡妈妈家酿糯米酒jiā niàng nuò mǐ jiǔ

Photo 16-2-17, 4 33 11 PM (1).jpg 
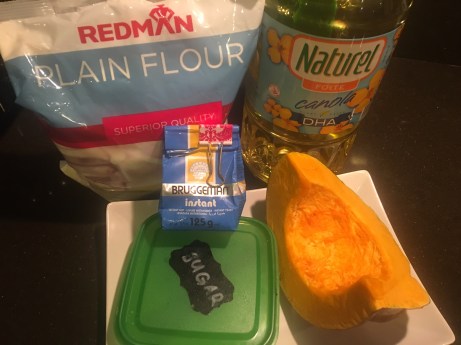
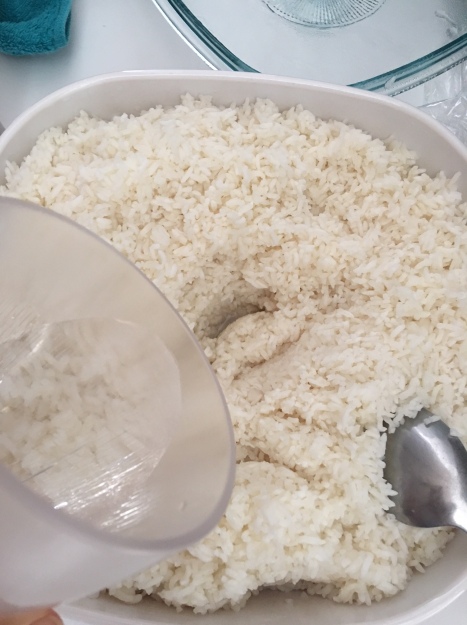
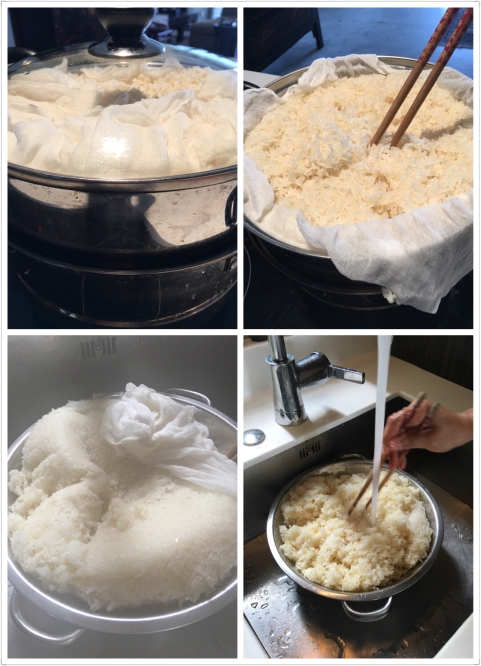
This  gentle, sweet-sour, marvelously aromatic homemade liquor is a common flavoring for all kinds of  China regional cuisines. You can find the rice wine (sometimes called Chinese Cooking Wine) in the Asian supermarkets, but the homemade version is much more delicious and it is surrisingly easy to make. No preservative is added. It keeps for ages in the fridge.
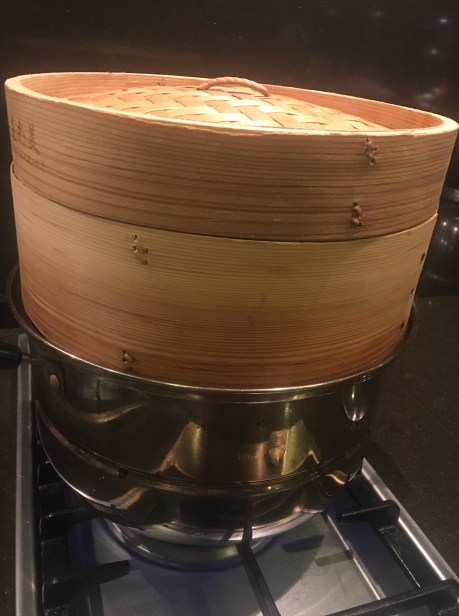
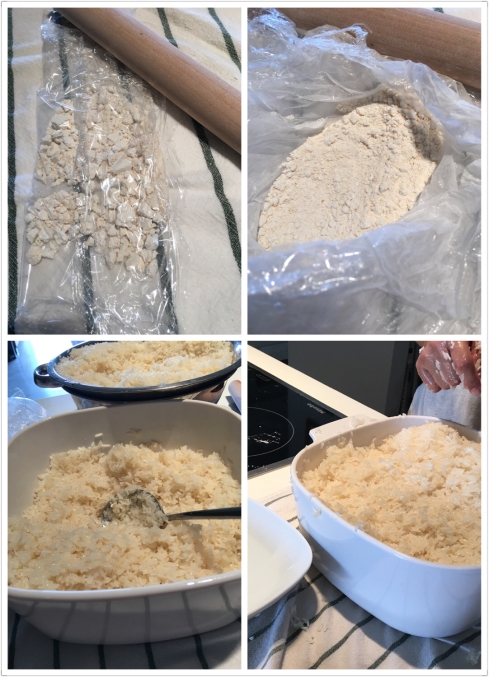
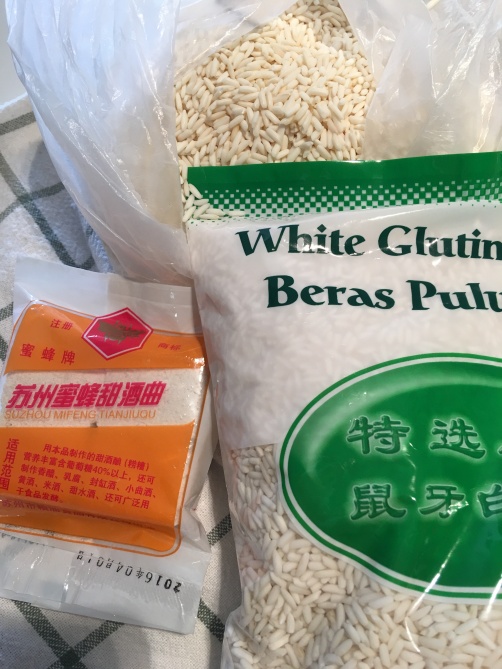
Yields 1.5 – 2 litres of Rice Wine

 Ingredients

  • 1800g           White Glutinous Rice白糯米
  • 20-25g          Wine Yeast 酒曲or酒药 (It is available in a little white ball about an inch in diameter or a biscuit and can be spotted in clear package in the Asian grocery markets. A simple recipe is sometimes written in the package.)
  • Water
  • 50g       Vodka (optional)photo-14-2-17-9-09-04-am-1Equipment
    • A big mixing bowl
    • A colander 漏勺/滤锅
    • Parchment paper (烘培纸) or cheesecloth or 棉纱布
    • A 6-quart airtight container
    • A steamer  蒸锅            Photo 14-2-17, 9 13 50 AM (1).jpg

    Method

    1. Sanitation is very important. Make sure all the equipments and your hands are well cleaned and air dry. Everything that touches the rice at every stage must be absolutely clean. If there is even a whisper of oil or contamination anywhere along the way, the whole batch could go bad in an instant.
    2. Rinse the glutinous rice in running water till water becomes clear. Soak the rice in the clean room-temperature water for at least 3 hours. (No need to cover.) Drain.IMG_7671.JPG
    3. Place parchment paper (or a clean wet cheesecloth) in the basket of the steamer. Add into the rice. Use chopsticks to gently stir to loosen the rice. This would help water steam go through for a fast and even cooking in the process followed.IMG_7672.JPG
    4. Cook over high heat for about 30 minutes after the water starts boiling. In the middle of the process, insert chopsticks in the rice and move up and down for a couple of times. This step helps loosen the rice for the same reason mentioned in the step #5. The rice shall become sticky and translucent if it is properly cooked. Move the rice to a colander. Rinse in the running water to cool it off. Be very careful as the rice is quite hot. Drain.IMG_7673
    5. Use a rolling pin to break down the wine yeast to make it almost powder. Move the rice into an airtight bowl by batches. Sprinkle the wine yeast powder on top of each batch of the cooked rice. Gently pat and press down the rice to tighten the mix in the container.Photo 16-2-17, 10 41 29 PM (1).jpg
    6. Add a 250 gram room-temperature water in a clean bow, form a well of 7-8cm in diameter in the center of the rice, rinse your hands in the water to make sure no yeast left in your hands. Then pour all the water into the well.IMG_7675.JPG
    7. Cover the container. Seal it with cling film or plastic bag. Keeping the mix WARM for 2-3 days is also very important. You can even wrap the container with a kitchen towel or a bath towel. Place the container in a place undisturbed with ideal room temperature of 28-30℃.Photo 16-2-17, 10 43 16 PM (1).jpg
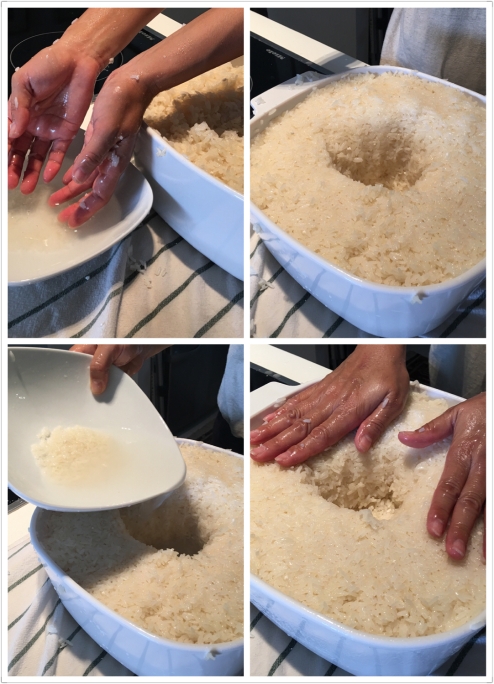
In 24 hour later, you have the option of opening the cover and pour into 50g Vodka on top of the rice. Then cover and re-wrap the container again.  The alcohol helps prolong shelve life of the fina product of your rice wine. You can leave the bottled wine on the shelve of your pantry for many months. You have the option of not storing it in the fridge.add Vodka.JPG
    8. In 48 hours or so later, uncover the container. The mass of fermented rice shall float on top of the wine. Use a really clean spoon to gently press down the fermented rice. You should see wine comes out on the top of the container. Taste the wine. It should be sweet and alcoholic. Rice wine is successfully done now. Or let the mix ferment for another day until you like the balance of the flavors. Then refrigerate. It will keep for many months. But I doubt that it will be hanging around that long once you try it.Photo 16-2-17, 10 50 16 PM (1).jpg