 It is the time of the Year! With the Chinese New Year around the corner, you can find pineapple tarts just about everywhere in Singapore or Malaysia . Every bakery that churns them out is claiming that it’s tarts are the best. But I found out today these melt-in-mouth homemade tarts with buttery crumbly pastry and fresh homemade pineapple jam are the BEST I’ve had so far. It calls for simple and fresh ingredients with minimized use of sugar. No preservatives added at all.
Makes 100 pieces
Wrappers
- 510g plain flour/all purpose flour 中筋面粉
- 350g unsalted butter
- 100g condensed milk 炼乳
- 2 egg yolks room temperature
Homemade pineapple filling (pineapple jam)
- 3 ripe pineapples
- 250g granulated sugar 白砂糖 (adjust the amount of sugar by 20% based on the ‘sweetness’ of you pineapple)
Method
Step 1 make pineapple filling/jam
- Peel the pineapples. Cut away some of the core but not totally remove it (By leaving small part of core so the jam has some bites in.) Cut into small cubes. Put 1/4 of the pineapples into a blender till it becomes puree (do not add water). Do the same with the rest of pineapple cubes. Sift the pineapple puree so to remove some of the juices. Don’t throw the juices away – the byproduct makes a couple of glasses of good fruit juice.

- Cook sifted the pineapple puree in a wok or sauce pan over medium heat for about 10 minutes till juice almost evaporates. Now add in sugar. The mixture will turn watery again after sugar added. Continue stirring with a wooden spoon for about 15 minutes till it becomes a thick paste.Reduce the heat to low and cook for about 60 minutes. Stir from time to time to avoid burning. Scoop out the pineapple jam into to bowl and let it cool completely. Scoop a small portion (10g) and use your hand to shape it into a ball. If you find it is too watery to difficult to make it into a ball, just place the jam the fridge for a few hours then try again.

Step 2 make the wrappers
- Sift the flour. 面粉过筛. Cut the butter into small cubes. Use your fingertips to rub butter in the flour till the mixture resembles bread crumb. Add into the mixture the egg yolks and condensed milk. Use your hand to combine them together till it becomes a soft dough. Wrap the dough in cling wrap and leave it in the fridge for 20 minutes.

Step 3 Assemble
- Divide the pineapple filling/jam into 100 portions (8g each) and roll them into a small ball
- Roll the dough into 100 portions balls (10g each) and roll them into a small ball
- Flatten a piece of the dough ball, place a pineapple jam ball in the middle. Bring the edges together and press tightly to seal. Roll it in between your palms to shape it into a ball.
- Use a paring knife, cut the criss-cross shape on the top to create pineapple pattern. Or use any fun or desired small-size cookie cutter or pastry cutter that you happen to have at home.
- Place all the little pastries on a baking tray lined with parchment paper.
- Apply egg wash with a brush. Try to brush the entire pastry ball including top and sides.
- Preheat the oven to 165℃. Place the baking try in the upper deck of the oven. Bake for 24 minutes or till they become golden brown.
- Cool completely before enjoying.

 This famous Thai street food can be such a hearty meal even though it takes no more than 15 minutes to prepare and cook. Do not confuse the Thai basil (holy basil) with its Italian cousin (sweet basil). The Thai holy basil has small, narrow leaves, purple stems, and pink-purple flowers with distinct, spicy and anise-clove flavor.


 The classic Sichuan dish is named after its unique cooking process. “回huí” indicates returning. Twice-cooked pork means that the pork should be cooked twice. Firstly pork is boiled in water until nearly cooked – a simple yet smart method to help lock in the moisture resulting in juicy meat, then use Doubanjiang (fermented bean paste), fermented black soy bean (Douchi), ginger, garlic and side ingredients to stir-fry for flavoring.
 Instructions


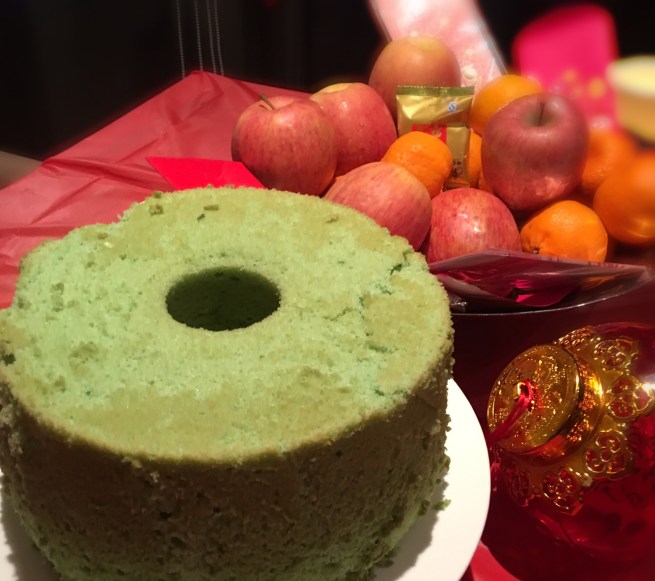 The celebrity chef Nigel Lawson was recently quoted that Pandan leaves are the next big food craze in the US and UK. This unique Southeast Asia plant, which are found in the backyards of many Malaysian homes, has a sweet fragrance that is likened to vanilla. Its extracted juices are the natural food colouring that is commonly used in some popular Southeast Asia desserts. It is also an essential ingredient for making the famous Singapore Chicken Rice.


