Dinner Rolls餐包cān bāo

cover.jpg
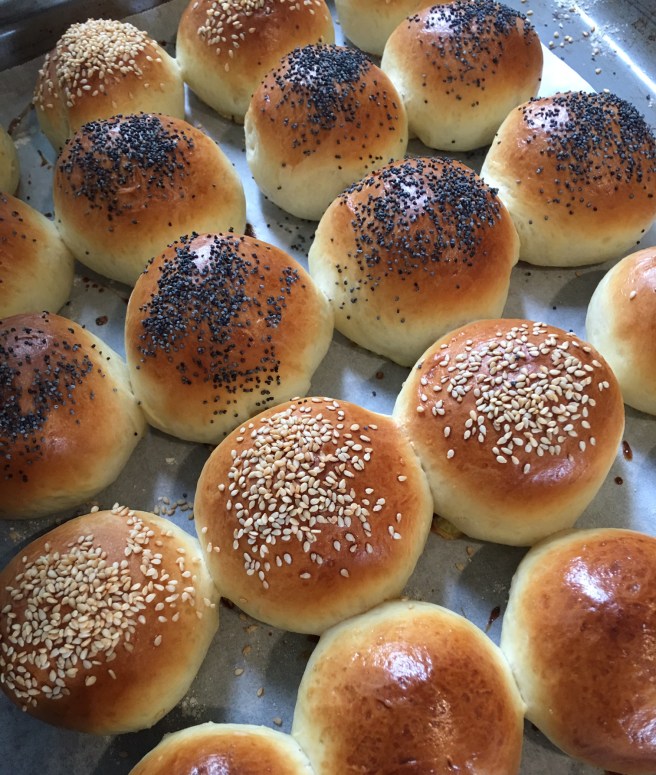
You will feel cozily competent after baking these cute and soft buns for your family dinner table or party. They are easy to pull off. No bread machine is involved. No kneading is required.

Makes about 20 rolls,

  • 300g         plain flour中筋面粉
  • 1 tablespoon   dry yeast 酵母
  • 1/3 teaspoon   salt盐
  • Milk          120ml (room temperature)
  • 35g           unsalted butter (melted by using microwave and cool off), room temperature
  • 1 tablespoon    honey
  • 1 egg, beaten
  • 1 tablespoon    sesame seeds or/and poppy seeds (optional)IMG_5995.JPG

Method

  1. Melted butter by using a microwave or heat the butter on a frying pan over low medium heat for 1-2 minutes. Cool it off. Beat the egg. Prepare ¼ cup of lukewarm water (40°C). And add into the yeast. Mix well and make sure yeast is dissolved.In a mixing bowl, combine all the ingredients except the sesame seeds. Also use only half the beaten egg (save the other half portion for glazing use). Use a spatula to combine the ingredients together till you see a smooth dough. It takes about 2-3 minutes. It is important to use the milk in room temperature. So either take milk from fridge earlier or heat it up to 40°C  IMG_6010.JPG
  2. Cover the bowl with lid. Wrap the bowl with a plastic bag. Let the dough rest for about 2 hours till the dough becomes 2.5 to 3 times bigger in size.IMG_6012.JPG
  3. Punch air out of dough. Oil a baking sheet and set aside. Pull off pieces of dough the size of walnuts, and form into round balls. Place on baking sheet almost touching each other, in 4 rows of 5 each. Cover with a kitchen towel, and let rise in a warm place 30 minutes. Meanwhile, heat oven to 200°C.IMG_6008.JPG
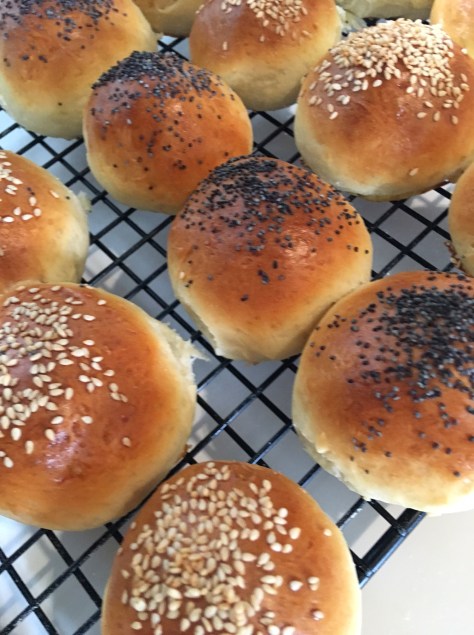
  4. When rolls have risen. Paint rolls with glaze. Sprinkle one row with sesame seeds and the next with poppy seeds; leave the third row plain, and then repeat pattern. Varieties of seeds are optional. You can choose to use one kind or none at all.IMG_6009.JPG
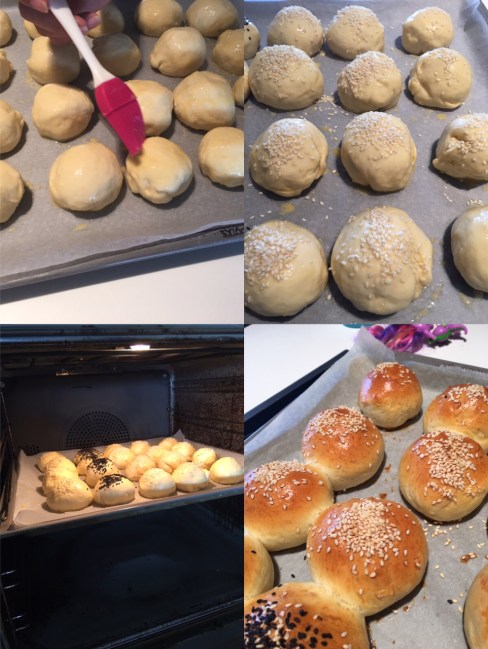
  5. Bake rolls until risen and golden brown, about 15-18 minutes. Transfer to a cooling rack or serve immediately.cooling

Spinach & Warm Mushroom Salad 菠菜蘑菇沙拉

cover.jpgThis comfort-food salad’s bold dressing has big umami flavor and meaty texture, thanks to the cooked mushrooms. It is a great option for either family meal or your dinner party.  It takes less than 10 minutes to put together – will this give you another reason to try homemade salad dressing?

Serves 2-4,

  • 100g             baby spinach or spinach (leaves only),菠菜叶

For the mushroom-vinaigrette dressing

  • 2 tablespoons    extra virgin olive oil
  • ¼  yellow onions, sliced
  • ¼   red bell pepper, sliced
  • 4-5   sliced mushroom such as swiss button or shiitake mushroom
  • ¼ teaspoon        ground pepper
  • ¼ teaspoon   sea salt
  • 1 tablespoon      balsamic vinegar

IMG_5754.JPGMethod

  1. Place spinach leaves in a salad plate or bowl.
  2. Slice yellow onion, bell pepper and mushroom. In a medium saucepan, heat 2 tablespoons of extra virgin olive oil over medium heat. Add yellow onion first, saute for 2-3 minutes till soft, then add mushroom, cook for 2-3 minutes till soft and add bell pepper. Mix them well, then season it with ground pepper and sea salt. Add 1 tablespoon balsamic vinegar. Mix well. The warm mushroom vinaigrette dressing is done.IMG_5786.JPGIMG_5787
  3. Immediately pour the dressing on top of the baby spinach. Toss and Coat. Serve.


Kimchi韩国泡菜hán guó pào cài

cover.jpgYears ago I tried kimchi it was not, I must admit, my favorite food. I was wholly converted after one day I had tasted an amazing Kimchi-flavoured dish. Once you’ve tried the homemade Kimchi, you may never want to go back to the supermarket anymore. The homemade Kimchi is ready to eat after two days of fermentation in the fridge. It can be stored in the fridge for up to 5 months. The flavour, by then, maybe too pungent for the vegetable to be eaten raw. But at this stage, it is perfect to flavour any cooked dishes.

  • ½ head (1000g )  Napa cabbage 大白菜
  • 40g                       sea salt

Marinade

  • 25g                                    glutinous rice flour糯米粉
  • 200g                                  water
  • 1 pear                                remove the core and minced
  • 60ml                                  fish sauce鱼露
  • 60g                                    korean red chili powder韩国辣椒面
  • 1 tablespoon                  garlic, minced
  • 1 tablespoon                   ginger, minced
  • 25g                                  Chinese chive, 韭菜,cut into 5-6cm in length
  • 1 tablespoon                  shrimp paste虾酱 (optional)
  • 1 teaspoon                      caster sugar
  • ½ teaspoon                      salt

IMG_5397.JPGMethod

  1. Prepare the cabbage: Wash the cabbage. Make a deep cut across the base of the head of and split it in two. Put in in a large bowl. Sprinkle with the sea salt. Make sure to coat between the leaves and let sit for 4-5 hours.IMG_5723.JPG
  2. Prepare the glutinous rice paste: Add 25g of the glutinous rice flour to a sauce pot with 200g water over medium heat and, stir continuously, bring to a boil. When it turns to ‘glue’, turn off the heat and continue stir it until it cools down a bit. I removed it from the pan and put it in a bowl in the fridge to really chill out a bit while I tended to the rest of the recipe.IMG_5725.JPG
  3. Prepare the red chili paste: core and mince the pear, combine together with fish sauce, red chili powder, minced garlic, ginger, Chinese chive, shrimp paste, sugar and salt. Mix well. Then add prepared glutinous rice paste. Mix well.IMG_5726.JPG
  4. Prepare the kimchi: Rinse the now-softened cabbage under running water. Drain the cabbage and remove as much water as you can. Place the cabbage into a large bowl and coat with the red chili paste, ensuring the paste goes between the leaves that no leaf is left uncovered. Place them in an airtight container.IMG_5727.JPG
  5. Fermentation: Place the container in the fridge. The Kimchi is ready to eat after two days. Kimchi can be stored in the fridge for up to 5 months. The flavour, by then, maybe too pungent for the vegetable to be eaten raw. But at this stage, it can be used to flavour cooked dishes.


Red-braised Lion’s head Meatballs红烧狮子头hóng shāo shī zǐ tóu

cover.JPGLion’s head meatballs are one of the crowning glories of the cooking in the beautiful Lower Yangtze  River region of China. The essential trick for this recipe is to cut the pork by hand. The legend says that the meatballs resembled lion’s heads as they are made from hand-chopped, coarse and chunky meat. I have never been struck by the resemblance. But I adore the dish because of its interesting texture, tender meat and exquisite sauce. You can replace the red-braised sauce by simmering the meatballs in a clear broth.

Serves 4-6

For the meatballs

  • 450g                     ground pork ideally made from pork belly (30% fat in minimum) and cut by hand猪肉末(5 到7成瘦)
  • 6                            water chestnuts荸荠 (skin removed and coarsely chopped)
  • 1 tablespoon     spring onion (white part only),葱白末
  • ½ tablespoon    ginger, minced姜末
  • 1/3 teaspoon    salt
  • 1 tablespoon     sesame oil香油
  • ½ tablespoon    light soy sauce生抽酱油
  • ¼ teaspoon        ground white pepper 白胡椒粉
  • 1 teaspoon      caster sugar白糖
  • 30g                      water starch (1 tablespoon corn starch mixed with 20g water)水淀粉
  • 4 cups                 cooking oil for deep-frying

For the braising sauce

  • 1 teaspoon        chiankiang vinegar镇江香醋
  • 1 teaspoon      caster sugar白糖
  • 1 tablespoon     dark soy sauce老抽酱油 (optional)
  • 1 cup                  water
  • 1 and half tablespoon    corn starch淀粉 ( mix with 3 tablespoons of water)

Bok Choy (optional) 青菜 (poached or quickly stir-fried) 白灼或者清炒的青菜芯, for decorationingredients

Method

  1. Put the meat in a mixing ball. Add all the ingredients (except water starch and cooking oil). Mix the ingredients by stirring in one direction so that all the fibres of the meat will line up, making it very smooth. Add in water starch and mix well by stirring in one direction until all water are incorporated.IMG_5612.JPG
  2. Now let’s shape the meatballs. Pick a handful of walnut-sized mixture. Keep slapping the mixture against the inside palm of the other hand, then slap it back to the original hand. Repeat and do it for 4-5 times. This helps meat become springy and sticky in consistence. Now shape it into a ball. Repeat to make rest of the meatballs.IMG_5613.JPG
  3. Now let’s deep fry the meatballs. Pour the oil in a wok and turn up the heat to high. When the oil becomes very hot, add a few meatballs (do not crowd the wok. Otherwise the oil temperature would drop down too quickly and meatball would stick to the bottom of the wok). Cook over high heat for a few minutes. Then use a spatula to gently nudge the meatballs then flip each of the balls to the other side. Continue to cook for a few more minutes until brown/golden. Remove the cooked meatballs. Deep fry the rest of the meatballs.IMG_5614.JPG
  4. The last step is quick. Get a clean work. Add a tablespoon of cooking oil (use the leftover from deep-frying process) over medium high heat. Return all the meatballs, add the braising sauce including 1 teaspoon of chiankiang vinegar, 1 teaspoon caster sugar, 1 tablespoon dark soy sauce (if you prefer darker and shining meatballs) and 1 cup of water. Bring it to a boil. Turn the heat to medium. Move around the meatballs to ensure they are evenly coated with sauce. Let it simmer for 5 minutes. In the meantime, use a small bowl to mix 1.5 tablespoon corn starch with 3 tablespoons water. Add the mixture into the wok. Turn the heat to HIGH. The starch helps make sure all the meatballs evenly coated with the sauce. Turn off the heat once you see it becomes less watery and sauce has thickened. IMG_5616.JPG
  5. Place pre-cooked bok choy on a serving plate. Place onto all the meatballs. Drizzle with the remaining sauce in the wok.IMG_5618.JPG