Dynamite Dumplings

Ingredients (yields about 40 dumplings)

WRAPPER

270g                   all-purpose flour

About 2/3 cup                 water

(55% of water vs flour ratio in terms of weight)

FILLING

250g                                      ground pork

½ tablespoon                       ginger, peeled and minced

2 tablespoons                      green onions, minced

2/3 to 1 teaspoon              salt

1/2 teaspoon                      white sugar

1 tablespoon                       light soy sauce

1 teaspoon                           sesame oi

1 tablespoon                        Chinese cooking wine (substitute it with Japanese mirin)

2 cups                                   napa cabbage, minced

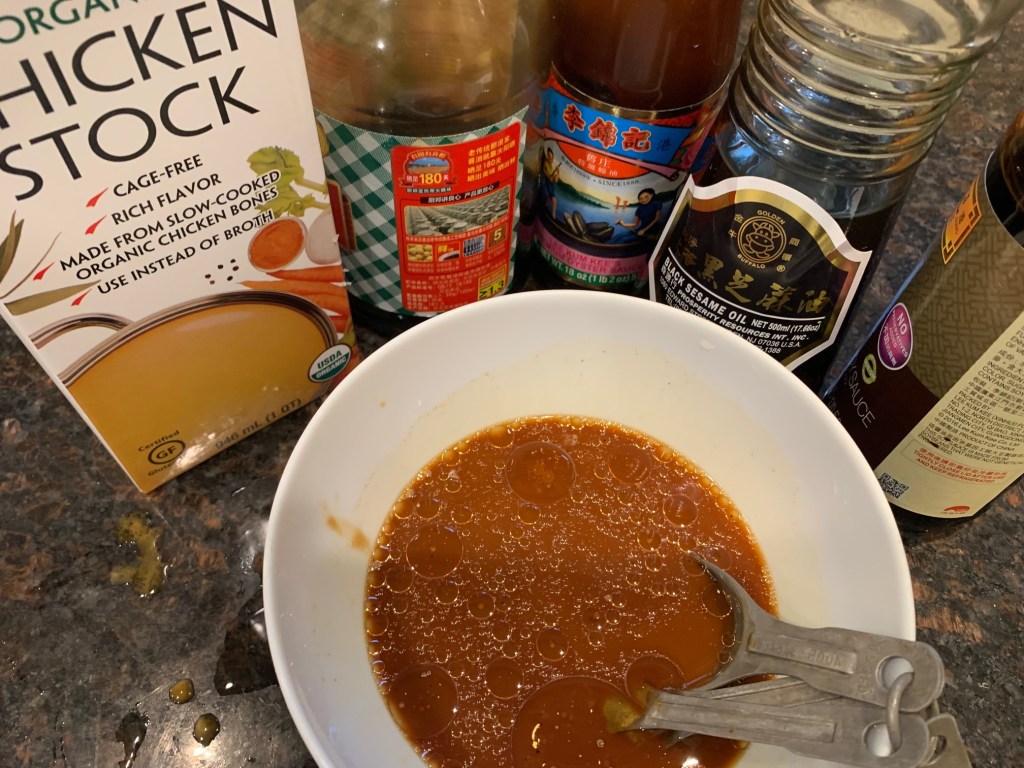
DIPPING SAUCE (for 1 serving)

1 tablespoon       Chinese Chinkiang vinegar (substitute with balsamic vinegar)

½ tablespoon       light soy sauce or to taste

1 teaspoon         any chili oil or minced fresh red chili, optional

Method

For wrappers

  1. Combine all wrapper ingredients in a mixing bowl. Use your hand to mix them together.
  2. Tip the dough out on a lightly floured surface and, using your fingers and palms, knead for 5-6 minutes till the dough becomes smooth.
  3. Put the dough back to the bowl, cover it with cling wrap and leave to rest for 20-30 minutes.
  4. Divide the dough into four equal pieces. Pick one piece, roll the dough into a long snake of about 1.5cm diameter then divide it into 10 equal pieces.
  5. Simply use your hand to pick up each piece and pound it into the floured surface to make a small circular disc. Then use a rolling pin to smooth out each disc till it’s about 8cm in diameter – edges are thinner than the center as this has to hold the filling. You can constantly dust the rolling pin with flour to keep the wrappers from sticking.

For filling

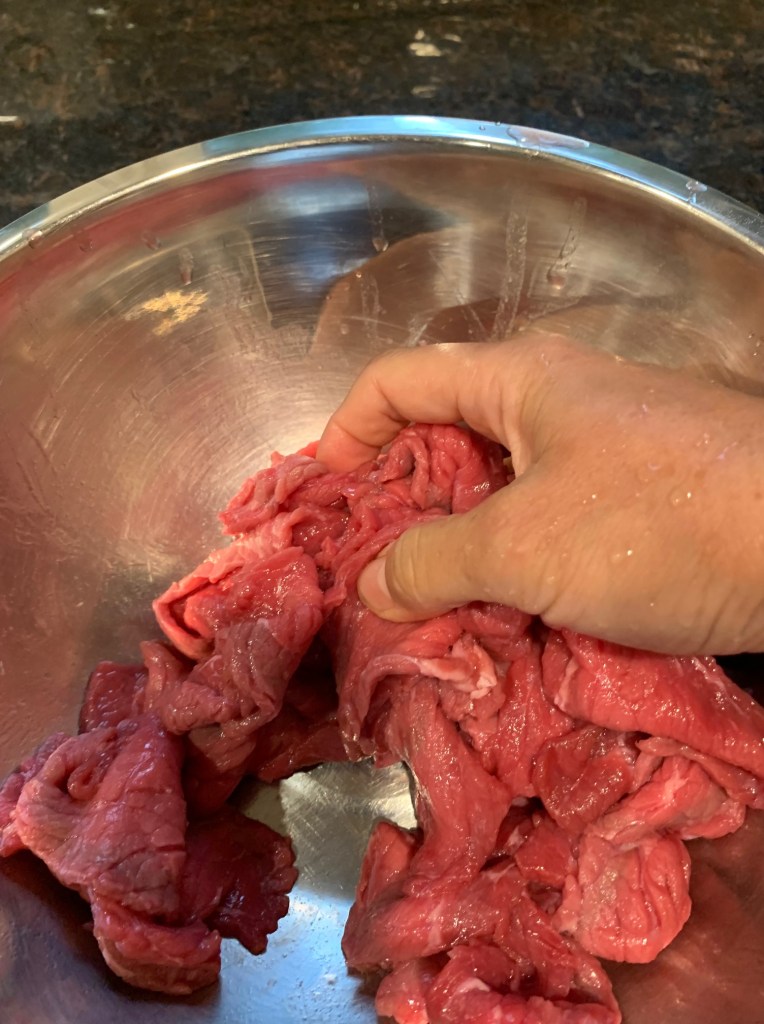
  1. Place ground pork in a mixing bowl. Add minced ginger and green onions. Mix well.
  2. Add rest of the filling ingredients and mix well.
  3. Combine above mixture with vegetable of your choice. Stir the mixture in one direction for about 50 times so they bind well.

Assemble

#1 Buddah’s Belly (pinched-edge dumpling:this method is the most popular and fastest folding way for boiled dumplings in China. Place a tablespoon of filling in center as an American football, fold the wrapper in half at center firstly. Use your left thumb and index finger to hold the left half and use your right thumb and index finger to hold the right half. Simultaneously, slightly squeeze the two side toward the center part while pressing the two edges together. 

#2 One-line dumplings place a wrapper in the palm of your hand and spoon 1 tablespoon of filling into the center of the wrapper, form a taco shape and bring the front and back together in the middle. Start folding (making pleats), pinching and sealing one end of the wrapper, heading towards the middle. Then do the same with the other end. Aim to make 2 folds on each side. This type of fold works well with water-boiled dumplings. 

#3 Two-direction crescent moon dumplings: place a wrapper in the palm of your hand and spoon 1 tablespoon of filling into the center of the wrapper, form a taco shape and bring the front and back together in the middle. Start folding(making pleats), pinching and sealing the edge of the wrapper, moving out from the center to the end of one side until they’re sealed to the ends. Aim to make 3 to 4 pleats/folds on each side.  Best for boiled dumplings. 

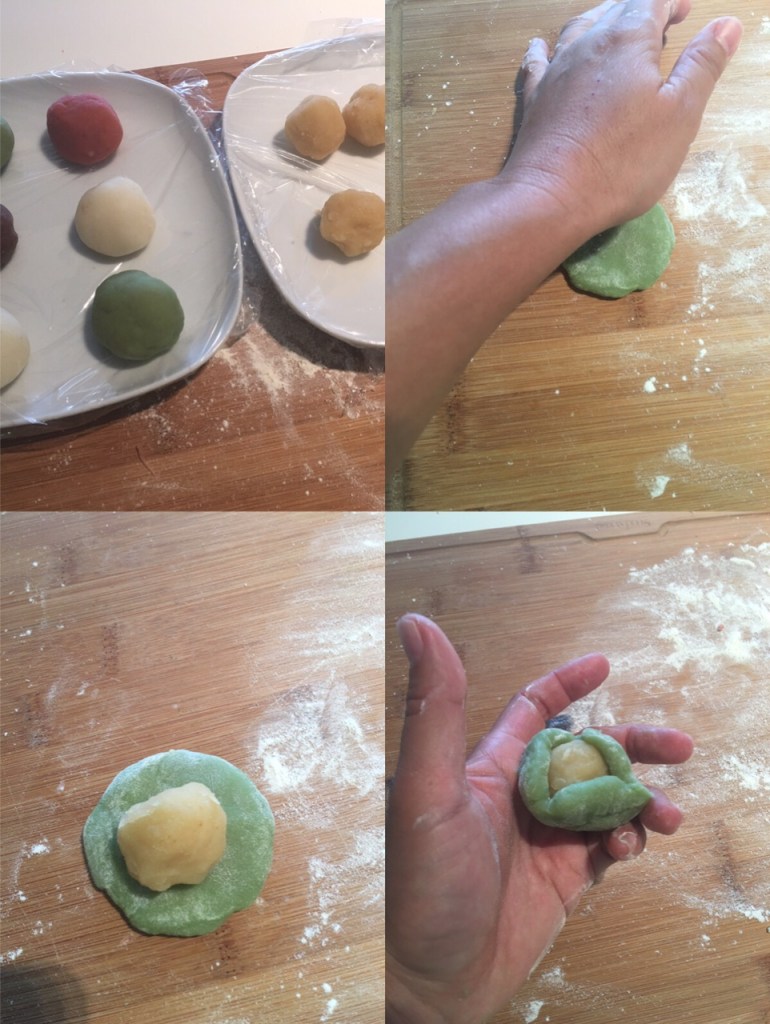
#4 One-direction crescent moon dumplings:place a tablespoon of filling in the center the wrapper in one palm, using the fingertips of the other hand make pleats along the half of the edge of the wrapper (like the way you make Bao Zi or Soup Dumplings). Lift up the other half of the edge of the wrapper and seal the edge with the pleats. 

#5 Tortellini (Chinese Ignots) – place a wrapper in the palm of your hand and spoon 1 tablespoon of filling into the center of the wrapper, form a taco shape and bring the front and back together in the middle. Use your finger tips to pinch around the edges of the wrapper and make sure the edges are really stuck together. Fold one side OUT to a middle point and fold the other side. Press the ends of two folds TOGETHER. 

How to cook 

Option A – water-boil

  1. The whole process takes about 12-15 minutes.
  2. Bring a big pot of water to a boil.
  3. Add the dumplings into the boiling water and cover the pot. Fill into the pot with 1 cup of cold water every 2-3 minutes for three times whenever the water starts boiling. Use the slotted spoon to push around the dumplings in the water to keep them sticking to the bottom from time to time.

Option B – pan-fry

  1. Coat a medium size frying pan with 1 tablespoon of cooking oil and place it on the stove over medium heat.
  2. Place into 10 dumplings. Dumplings can be close to each other. Once the bottom of the dumplings is browned, gently add into about ½ cup of water and cover with a lid immediately. The water shall cover about half of the height of the dumplings. Cook for about 7-8-minutes. During this time, you will likely hear the ‘popping’ from the pan. The sound means that bottoms of the dumplings are getting nice and fried while the fillings and tops steam. What you are waiting for is the water to evaporate. When it does, the sound under the lid will change from bubbly pops to a pretty serious steady crackle. At this time, you can lift the lid away and peek to see if the pan’s dry. If not, cover it again.
  3. After you’ve uncovered the dumplings, turn off the stove. Jerk the pan a little to give it a good shake and see if the dumplings are stuck or if they slide away. If they seem stuck, shake the pan a little more to unstick them or slide a spatula under them to separate them from the pan.
  4. Center a heatproof plate that’s bigger than the pan over the pan. Put on oven mitts to protect your hands. Holding the pan and plate tightly, flip them both together. Do it fast! Lift off the pan. This step is optional – if you do not feel comfortable to flip the plate, just use a spatula to move the dumplings to a serving plate.
  5. Serve hot.

Dipping Sauce

  • Simply add, combine and mix all the ingredients in a dipping sauce plate.

Snow Skin Mooncake冰皮月饼bīng pí yuè bǐng

Hello Kitty Snow Skin Mooncake
Snow Skin Mooncake

Snow skin (Mochi) mooncake is a non-baked mooncake eaten during Chinese Mid-Autumn Festival. The mooncake skin texture is quite similar with mochi: soft, chewy and milky. While snow skin mooncake can be filled with variety of things, lotus seeds paste is my favorite. Lotus seeds are used extensively in Chinese cooking, especially in the form of paste. The paste can be made in advance and keep refrigerated or frozen. Snow skin mooncake should be kept refrigerated in airtight container and typically serve cold. You shall be able to find all the ingredients and the mooncake mould in Asian markets or Amazon.

Makes about 20 pieces (50g each piece)

Homemade lotus seeds paste filling 莲蓉馅 (yield 450g lotus seeds paste)

150g           dry lotus seeds 白莲子

800ml          water

110g           granulated sugar 白砂糖

15g            glutinous rice flour糯米粉

75g            cooking oil

3 tablespoons    water

¼ teaspoon      salt

Wrappers (yields about 640g snow skin/Mochi)

350g                      milk

35g                                        cooking oil

100g       glutinous rice flour糯米粉

80g        rice flour米粉

40g        wheat starch 澄粉

80g        powdered sugar糖粉

1 teaspoon  green tea/cocoa powder(optional)

A few drops  food coloring (optional) or use natural coloring like pumpkin juice or carrot juice

50g        glutinous rice flour糯米粉 (cooked, instructions below) for dusting

Method

Step 1  make the lotus seeds paste

Wash and rinse 150g dried lotus seeds. Soak for a few hours or overnight in the refrigerator (depending on the dryness of the seeds). Soaking help lotus seeds to cook evenly and reduce cooking time.Split the seed in half and remove the bitter-tasting germ (green sprout).

Drain the add in 800ml water, bring to the boil, reduce to low heat and cook for 1 hour and half. Keep the pot partially open to prevent boiling over. Try to use a spatula to stir from the bottom every 20 minutes to keep it sticking to the bottom.

Puree until smooth using a blender. If your lotus seeds seem too dry, just add a few tablespoons of water. Sift the lotus seeds puree for smoother paste texture.

In a small bowl, mix 15g glutinous rice flour and 3 tablespoons of water. Add the mixture into the pot together with 100g sugar, ¼ teaspoon salt and 75g cooking oil.  Stir well.

Cook over medium-low heat until smooth paste formed, stir constantly. It takes about 40 minutes, cooking time may vary slightly depending on your cooking temperature.

Cook until puree thicken, smooth and silky paste formed. Wrap with cling film and keep it in the fridge for a few hours. Paste will harden slightly when fully cooled.

Step 2   make the wrappers snow skin/Mochi

Add in all snow skin ingredients, mix until smooth. Sieve the mixture into a bowl. 过筛

Cover the bowl with clingy film and steam over medium-high heat for 25 minutes.

Mix the cooked dough with chopsticks while still hot. (it makes easier to handle than with spatula).   After the dough has slightly cooled down, wrap it with clingy film and keep refrigerated for 2 hours, or until fully cooled.

Step 3   Assemble

Prepare the dusting flour by cooking the flour. Place a small amount of glutinous rice flour (50g) evenly in a dry pan and cook for about 10-15 minutes over lowest heat. Stir from time to time. It is done when the flour slightly turns yellow.

Lightly dust the inside of the mooncake mould with cooked dust rice flour.

Divide the dough and filling into small equal portions (dough/wrapper 30g each; filling 20g each). Lightly coat your two hands with dusting flour. Flatten the dough piece with palms, top with filling, then fully wrap the filling with dough.

Shape the filled dough into ball, then put into the mooncake mould to create pattern on it.

Chill the mooncakes for 1 hour before serving for a better texture.

Tips

  1. You can make bigger or even smaller mooncakes. Just remember to keep the ratio of filings and wrappers 2:3. I’ve used 20g filling and 30g wrapper to make one 50g mooncake.

Soy-glazed Squash Rice Bowl

This hearty and savory rice bowl would work well with any type of either summer or winter squash.

A friend gave me a beautiful squash harvested from her garden yesterday. I thought it was a type of snappy and watery summer squash or just a giant zucchini. It is still summer, isn’t it? While doing research on how to cook it, I found it actually belongs to the winter squash family. I then removed the thick and tough rind. I also precook the flesh in microwave to help soften the flesh. If summer squash, such as zucchini, is used, you can skip the ‘peeling’ and ‘microwave’ steps.

Serves 2-3

2 pounds     winter squash with skin (you will probably get 1 pound after skin and seeds removed)

2 tablespoons                  cooking oil

1 spring onion, minced

1 teaspoon   sesame seeds

cooked white rice

Seasoning sauce

½ teaspoon                      salt

½ teaspoon                      white sugar

1 tablespoon              light soy sauce

1 teaspoon                      dark soy sauce, optional

1 tablespoon          Japanese Mirin or Chinese cooking wine

2 tablespoons      chicken stock or water

1 teaspoon         sesame oil

Method

1. Remove the tough skin and seeds from the squash.  Then cut the flesh into half-inch pieces in thickness.

2. Place all the squash pieces flat in a plate, cover the plate with cling film then microwave over high heat for 2-3 minutes till softened.

3. Make the seasoning sauce by combining all the ingredients.

4. Add two 2 tablespoons of cooking oil in a frying pan over medium high heat. When the oil is hot, place into the squash pieces, pan fry for 3-4 minutes till golden, flip the pieces to fry the other side. Pour into the seasoning sauce evenly onto the squash pieces. Cook for another 2-3 minutes until seasoning sauce well absorbed by the squash. Turn off the heat.

5. Add one-serving cooked rice in a bowl. Place cooked squash on top of the rice. Sprinkle minced spring onion and sesame seeds. Repeat the process for  the other 1 or 2 servings.

6. Ready to serve.

Beef Broccoli Stir-fry西兰花炒牛肉xī lán huā chǎo niú ròu

There are a few key steps to make an authentic, tender, restaurant-style beef broccoli stir-fry. You will need tenderize and marinate the beef, pre-cook the broccoli, sear the beef then combine beef and broccoli with the cooking sauce.

A little secret to tenderizing the beef is hydrating the meat with a bit of water and adding a small amount of baking soda. You need a good 30 minutes for the beef to sit and tenderize. After tenderizing the meat, marinating it in some oil, oyster sauce, and cornstarch gives the beef that extra soft and velvety texture you find in Chinese restaurants.

Beef and marinade

  • 450g/1 pound                  sirloin beef steak (sliced 1/4 inch thick)
  • 1/4 teaspoon                   baking soda (optional),小苏打
  • 3 tablespoons                  water
  • 1 1/2 teaspoons               cornstarch淀粉
  • 2 teaspoons                     vegetable oil
  • 1 teaspoon                                  oyster sauce蚝油

Stir-fry sauce

  • 1 1/2 teaspoons               white sugar 
  • 1/4 teaspoon                   white peppercorn powder白胡椒粉
  • 1 and half tablespoons      corn starch
  • 2/3 cup                            chicken stock
  • 1 1/2 tablespoons            light soy sauce生抽
  • 1 teaspoon                                  dark soy sauce 老抽
  • 1 tablespoon                   oyster sauce蚝油
  • 1/2 teaspoon                   sesame oil香油
  • 1 tablespoon       Chinese cooking wine

For the rest of the dish

  • 4 tablespoon cooking oil
  • 2 garlic cloves, minced
  • ½ yellow onion, sliced
  • 2 cups  broccoli florets(200g)西兰花

In a bowl, add the sliced beef, ¼ teaspoon baking soda, and 3 tablespoons water (if you don’t want your beef tenderized too much, skip the baking soda). Massage the beef with your hands until all the liquid is absorbed. Mix in 1 ½ teaspoons cornstarch, 2 teaspoons oil, and 1 teaspoon oyster sauce, and set aside to marinate for at least 30 minutes.

Make the stir-fry sauce mixture by mixing together the chicken stock, sugar, light soy sauce, dark soy sauce, oyster sauce, sesame oil, white pepper and Chinese cooking wine. Set aside.

Let’s pre-cook the broccoli. If you use microwave, simple place your broccoli florets in a bowl. Push the ‘fresh vegetable’ function. Or you blanch the broccoli – bring 6 cups of water to a boil and blanch your broccoli for 30 to 60 seconds Drain and set aside. Either method, you will want your broccoli crunchy. Do not over cook it.

Heat your wok over medium high heat. Add 4 tablespoons oil and sear the beef on both sides until browned (this should only take 2-3 minutes). Cook the beef to rare. Turn off the heat, remove the beef from the wok, and set aside. Do not overcook the beef as the beef will be returned to wok later.

Set the same wok over medium heat.  Add into minced garlic and cook for 1 minute or so. Add into sliced yellow onions. Cook for another 2 minutes.

Next, add in the stir-fry sauce you made earlier. Stir the sauce around the sides of the wok to deglaze it (all those nice bits from stir-frying the beef should be absorbed into the sauce). Bring the sauce to a simmer.

Toss in seared beef and blanched broccoli. Mix everything together over medium heat for a couple of minutes until the sauce coats the beef and broccoli. Beef now shall be cooked to medium to well done and broccoli shall be still crunchy. Remove it from the stove and plate it. Serve with plenty of steamed rice!