Panang Curry Paste

coverPanang, also spelled Phanaeng or phanang, is a type of red Thai curry that is thick, salty and sweet, with a nutty peanut flavor. Loads of fresh, fragrant herbs and spices go into the paste. But don’t be put off by the long list of the ingredients. All of them require little to no preparation and are simply tossed in a food processor or chopper and easily blitzed. If you have trouble in finding Thai shrimp paste, you can use Japanese red miso which guarantees the authentic, rich and complex flavour the paste is meant to have.

Makes 1 cup

  • 2 teaspoons sea salt
  • 12 cloves, garlic, peeled
  • 2 tablespoons, cilantro stems
  • 20-30 dried red chili depending on your tolerance level of spiciness, softened in warm water
  • 2 teaspoons, white peppercorns, dry-roasted
  • 1 big thumb of galangal
  • 2 stalks lemongrass, white parts only香茅, roughly cut
  • 2 shallots, peeled小红葱头
  • 2 teaspoons, kaffir/lime leaves or lime zest
  • 2 teaspoons of Thai shrimp paste, or use 2 tablespoons of red miso
  • 7 to 8 tablespoons of unsalted peanuts, dry-roasted
  • 1/3 – 1/2 cup, waterIMG_5746

Method

  1. Place all the ingredients into a food processor, blender or chopper. Add 1/3 to ½ cup of water to help the machine running. Blender till the mixture becomes paste. The paste does not have to be very smooth. Transfer to a jar with a tight-fitting lid and refrigerate until ready to use.


Chinese Style Borscht Soup罗宋汤luó sòng tāng

cover
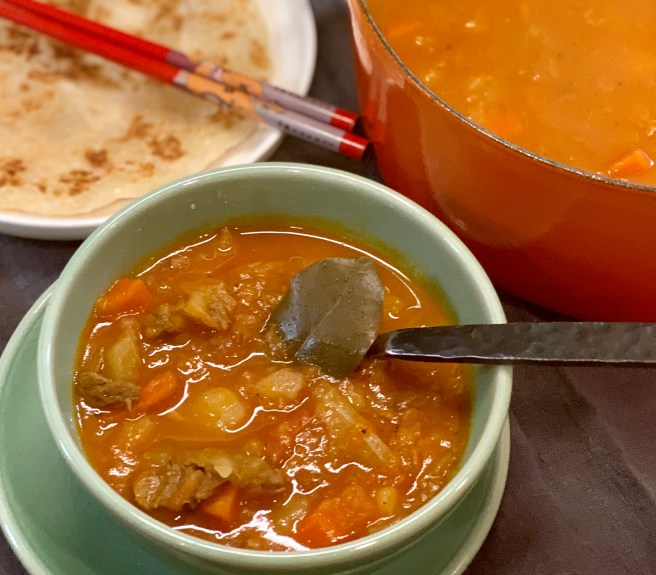
This tomato-based “Chinese Borscht” soup was in fact introduced and adapted by Russian refugees who migrated to Shanghai. Hence the Chinese name: 罗宋汤, which derived from the pronunciation of “Russian Soup”. The “Chinese Borscht” doesn’t include beetroots though, as Shanghai doesn’t have the suitable environment to plant beets.

Serve 4-6

  • 300 to 400                      beef chunk or shank (any cuts for stew), cut into cubes
  • 2 tablespoons cooking oil
  • 1 large yellow onion (about 250g), roughly chopped
  • 3 garlic cloves, peeled and crushed
  • 1 medium size carrot, peeled and cut into cubes
  • 1 stick of celery, cut into cubes
  • 2 to 3 tomatoes (about 300g), roughly chopped
  • 3 to 4 tablespoons tomato paste
  • 6 cups of unsalted beef stock (Use 3 cups of beef stock + 3 cups of water if you use concentrated beef stock)
  • 200g cabbage, roughly chopped
  • 1 to 2 bay leaves
  • 1 teaspoon salt
  • 1/3 teaspoon ground black peppercorn
  • 1 small russet potato, peeled and cut into 7 to 8 large pieces
  • Ground black peppercorn and salt to tasteIMG_5725

Method

  1. Rinse the beef chunks and pat them very dry (this helps brown the meat.). Cut them into small cubes. Place two tablespoons of cooking oil in a thick-bottomed soup pot over medium heat. Add the beef cubes and saute till they are browned.Add into garlic and yellow onion cubes and cook over medium heat till the onions turns soft.   IMG_5726
  2. Add into carrot and celery cubes and cook for a few minutes. Add into chopped tomatoes. Clear a space in the center of the pot, and add 3 to 4 tablespoons of tomato paste, letting it fry lightly. Stir and cook until the tomatoes are slightly dissolved and the oil in the pot turns reddish––a few minutes over medium heat.IMG_5730.jpg
  3. Now add 6 cups of beef stock (or 3 cups of beef stock + 3 cups of water) and turn up the heat to high. Add into cabbage and bay leaves add 1 teaspoon of salt and 1/3 teaspoon of ground black peppercorn. Cover and bring to a boil, then reduce the heat to simmer for 60 minutes.
  4. After 60 minutes of simmering, peel and cut the potatoes, and add them to the soup. Bring it to boil, then reduce the heat to simmer for 30 more minutes, or until the potatoes are tender. Salt to taste before serving.
  5. Soup and stews always taste better the next day, so don’t fret if you have leftovers. Freeze the soup for another meal, and you will be very happy that you did.

Notes:

  1. As this is tomato-based soup, the quantity of the tomato paste varies depending on how flavourful of your fresh tomatoes are. If you are luck to find very good quality tomato, you can use less tomato paste.

Chicken Corn Soup 鸡茸玉米羹jī róng yù mǐ gēng

cover
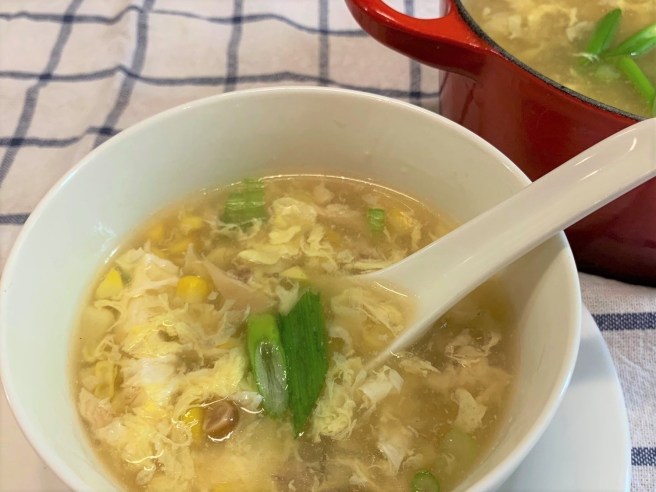
This light and healthy dish uses all the ingredients you would have in your pantry.  The contrast of natural sweetness from the corn and savoriness from the chicken is so obvious and truly delightful. It can be served as soup all year around or can be a perfect main course for young children.

Serve 2-4

  •  5 cups   chicken stock (click here for homemade chicken stock)
  • 150g    any leftover chicken meat, minced or diced. If you do not have any leftover chicken, just use chicken tenderloin
  • 250g     sweet corn by cutting the kennels off the cobs, those store-bought frozen whole kennel corn works perfectly fine too
  • ½ teaspoon, salt
  • 2 tablespoons, corn flour or potato flour + 4 tablespoons, water
  • 2 eggs, lightly beaten
  • ½ teaspoon  sesame oil
  • a pinch      white peppercorn powder白胡椒粉
  • 1 teaspoon    light soy sauce (optional)
  • Spring onions, sliced, for garnish (optional)IMG_6564

Method

  1. Pour in the chicken stock, stir and cook to the boiling. Reduce to low heat, add in chicken tenderloin or cooked chicken and cook until done. Add sweet corn, continue simmering until everything is cooked through. Add salt and stir to combine. Mix corn flour with water to obtain batter and stir in. This mixture will help thicken the soup.
  2. This step needs a bit attention and technique. Turn to low-medium heat. Use a spoon to remix your water starch (as indicated in step 2) in the bowl so it’s well combined. Use your soup ladle or spatula and stir the simmering soup at the center of the pot in a steady and circular motion to make a whirlpool while slowly pouring the water starch in a thin stream. This prevents the corn starch from clumping. Stop when you are about ¾ of the way done with your water starch to check the consistency of the soup. It should be thick enough to coat your spatula or ladle.
  3. Now let’s add in the beaten eggs. Keep the soup simmering and use the same technique with the beaten eggs and again, make sure the motion is fast enough so it will result in the beautiful swirls or egg “flowers” 蛋花instead of end up egg clumps.
  4. Season the soup with sesame oil and white peppercorn powder.
  5. Ladle into a soup bowl and garnish with spring onion. Serve hot.

Three-ingredient Duck Confit法式油封鸭fǎ shì yóu fēng yā

coverThis recipe and method will yield restaurant-worthy duck leg confit as well as a supply of duck fat to keep on hand for future duck leg confit experiments. This duck leg confit recipe bucks tradition, calling for three ingredients and three hours of time. You don’t need a supply of duck fat; you don’t need to devote three days of your life.

Serve 2-4

  • 4  duck legs
  • 1 tablespoon   kosher salt
  • 450g                  unsalted butter

Method:

Bake the duck in fat in low temperature

  1. Preheat the oven to 325ºF.
  2. Place duck legs in a 9×13-inch or other similarly sized baking pan — you want them to fit somewhat snuggly (more snug than what you see in the pictures is just fine). Sprinkle with the tablespoon of kosher salt. Cover legs with sticks of butter, breaking the sticks in half if necessary. Cover pan tightly with aluminum foil — use a couple of sheets of foil if necessary. Be sure to wrap tightly.
  3. Bake for 2.5 hours. Remove pan from oven. Let cool briefly, then remove foil to cool completely. Once cool enough to handle, transfer legs to a plate. Label it duck fat. Store in fridge indefinitely. When you make confit again, use this fat in place of butter. (Note: You may need to pop your vat of duck fat in the microwave so that you can pour it out of its container. Alternatively, plop the container into hot water, or let it sit at room temperature for a few hours.)IMG_6343
  4. If possible, bring the cooked duck legs to room temperature an hour before cooking. If you feel like being fancy, use the heel of your knife to whack off the top half of the bone nub at the end of each duck leg. Also, trim off any fat extending up the bone. Note: this is purely for presentation purposes and truly is not necessary.

Right before you serve the meal,

5. When you are ready to serve the meal, heat a cast iron skillet over medium heat. You should not need to add any fat to the pan — the duck legs should have enough fat clinging to their skin sides. Once hot, add duck legs skin side down. Let them crisp undisturbed for a minute or two. Shake the pan to make sure the skin isn’t sticking. If it is, use a spatula to gently separate the legs from the pan, being careful not to tear the skin. Continue crisping, repositioning the legs if necessary to ensure the skin is browning evenly, about 5 to 8 minutes total. Then flip the legs over and cooking for one minute skin side up. You don’t want to cook the legs too much on the flesh side or the meat will get too tough.